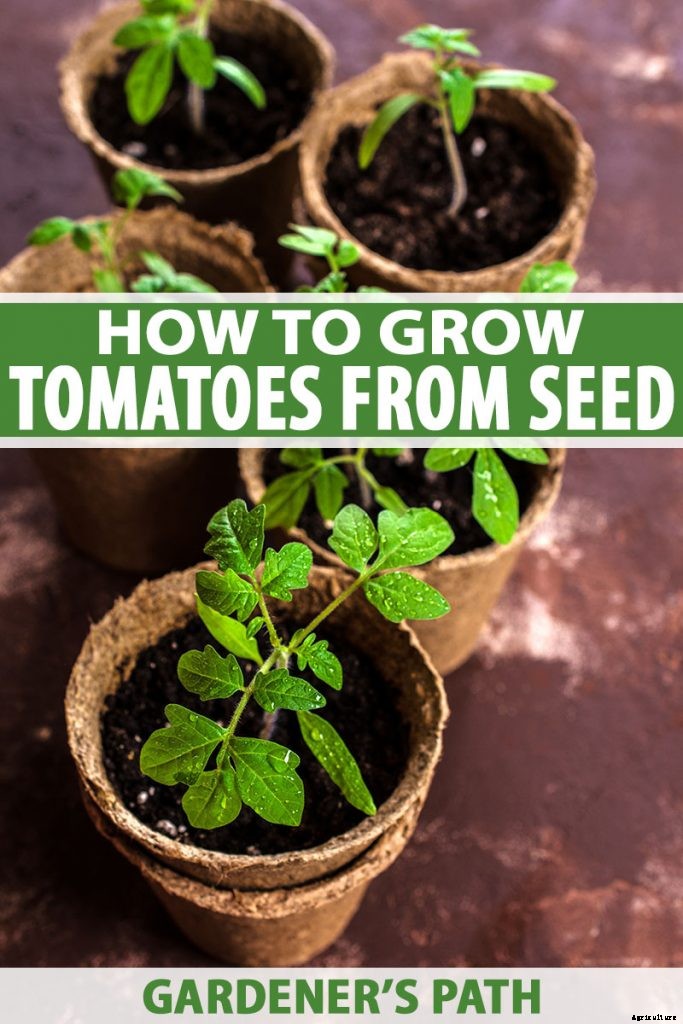
É muito fácil e conveniente pegar um pacote de mudas de tomate em seu centro de jardinagem local e colocá-las no solo. Então você pode se perguntar, quais são as vantagens de começar esses vegetais a partir de sementes?
A primeira razão que vem à mente é que começar seus próprios tomates a partir de sementes em casa é uma boa maneira de economizar dinheiro, deixando espaço em seu orçamento de jardinagem para outras coisas.
Normalmente, você pode comprar um pacote de cerca de 20 sementes pelo preço de uma muda.

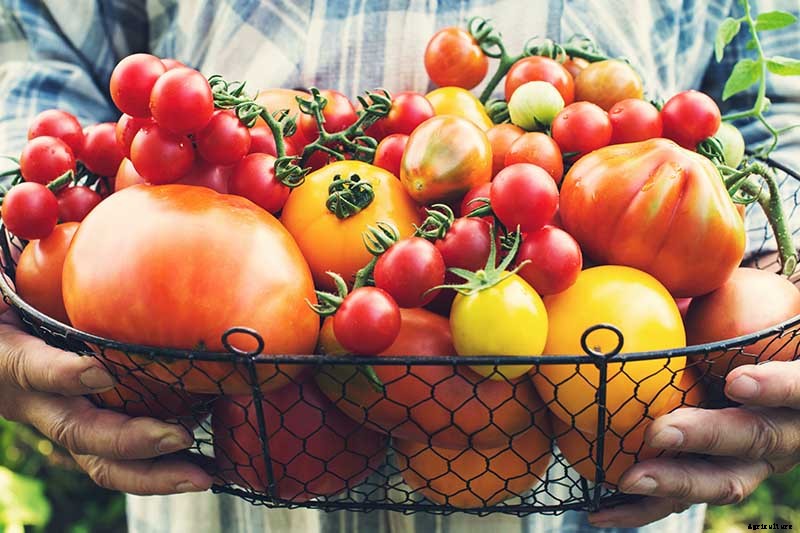
Mas o fator de motivação real para mim e muitos outros jardineiros é que começar sementes de tomate em casa abre uma seleção estonteante de variedades para escolhermos - incluindo cultivares menos comuns que dificilmente encontraremos como transplantes em nossos viveiros de plantas locais.
Então, se você está procurando um suculento, jumbo, fatiador de doce ou um minúsculo, cereja azeda , há uma incrível variedade de cores, formas, estilos de amadurecimento, usos culinários, e sabores para escolher quando você começa seus tomates a partir da semente.
Melhor de todos, o cultivo de tomate começa realmente não é tão difícil!
E se você seguir apenas alguns passos inteligentes que descrevi abaixo, você manterá seus começos felizes e saudáveis - fornecendo uma safra abundante de tomates caseiros suculentos que são praticamente garantidos para ter um sabor muito melhor do que qualquer coisa que você poderia comprar no supermercado local.
Abaixo, você encontrará um tutorial passo a passo para cultivar esses vegetais de clima quente a partir de sementes. Mas primeiro, Vou informá-lo de que tipo de suprimentos essenciais (e opcionais) você precisará para este projeto de jardinagem.
Aqui está uma visão geral do que irei cobrir:
O que você aprenderá
- Reúna seus suprimentos
- Como cultivar tomates a partir da semente em 6 etapas simples
- Saiba quando semear
- Prepare bandejas e semeie as sementes
- Mover-se para a estação de germinação
- Cuidado diário com suas mudas
- Repot e endurecer fora
- Transplante para o jardim
Reúna seus suprimentos
Antes de mergulhar, primeiras coisas primeiro. Na preparação para o cultivo de seus próprios tomates em casa a partir de sementes, você precisará reunir alguns suprimentos.
Algumas dessas são necessidades, como as sementes, mistura inicial ou solo, containers, e um borrifador.
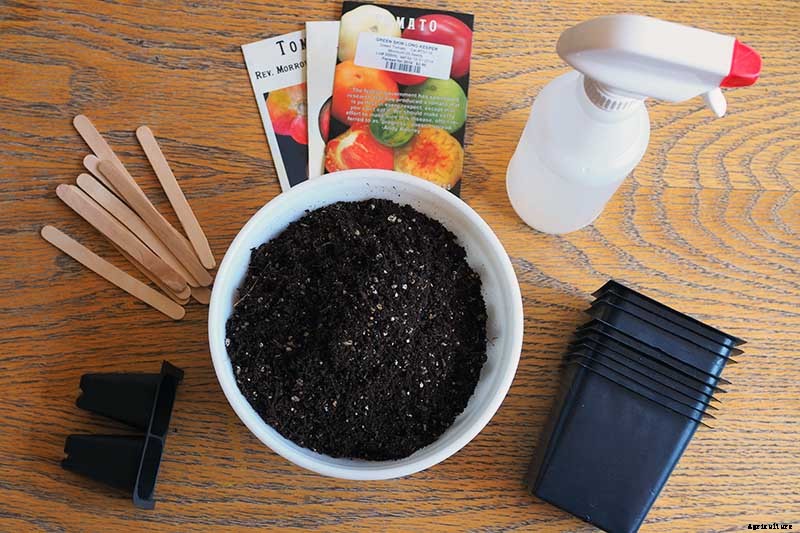
Suprimentos como marcadores de plantas, um widger, e uma estação de germinação são altamente recomendadas, mas existem muitas opções para você escolher, incluindo algumas possibilidades de DIY.
Existem também alguns itens nesta lista de suprimentos - luzes de cultivo e tapetes térmicos - que podem ser itens de bônus de luxo, ou pode ser necessário, dependendo da sua configuração.
Tudo bem, vamos repassar a lista do que você precisa, por que você precisa disso, e onde você pode obter esses itens. Preparar?
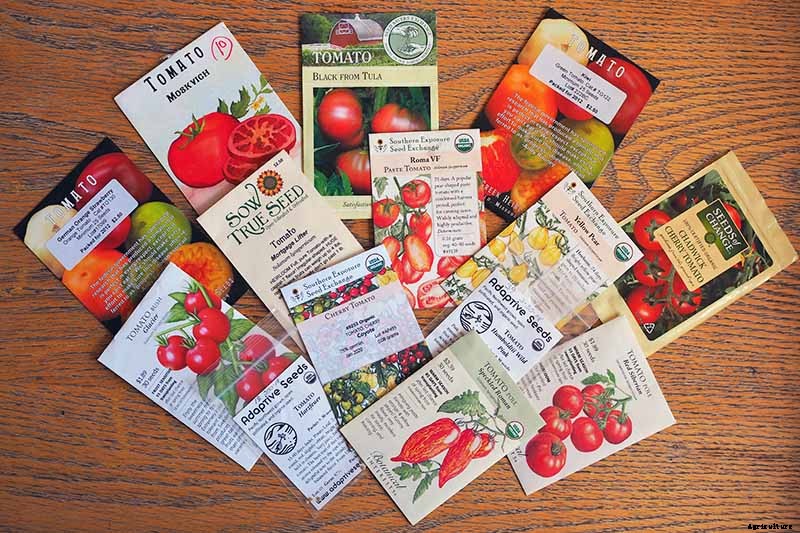
Sementes de tomate
Se você está cultivando tomates a partir de sementes em casa, você provavelmente vai querer tirar proveito de suas opções aumentadas e cultivar algumas variedades que não seria capaz de comprar para transplantes em seu viveiro local.

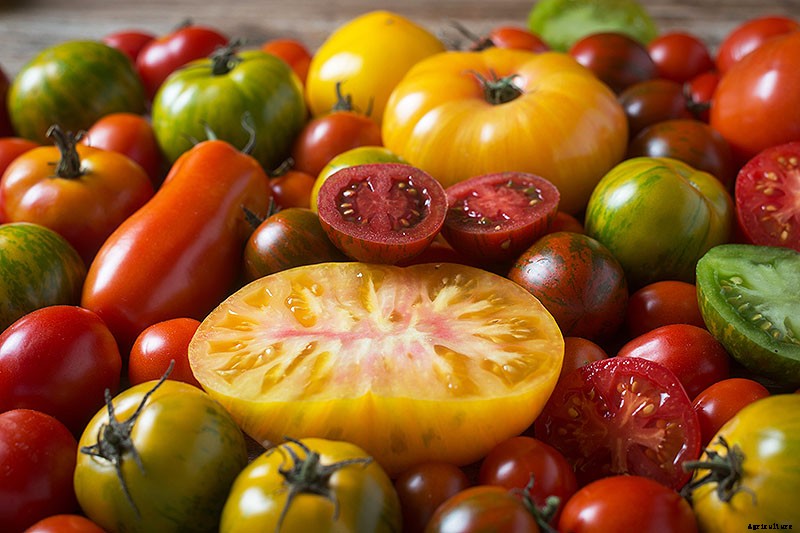
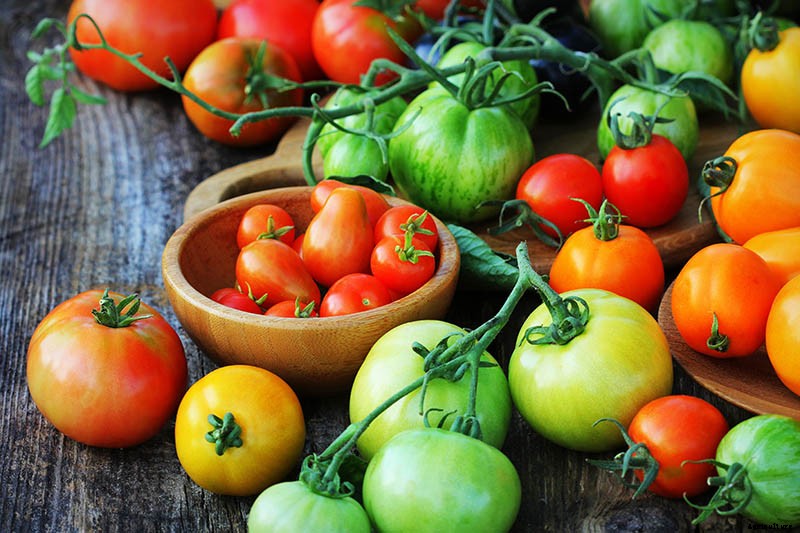
Catálogos de sementes contêm uma grande seleção de variedades, incluindo curta temporada, longa temporada, determinado e indeterminado , cereja , uva, ameixa, coquetel, bife, colar, herança , polinização aberta, híbrido , folha de batata, vermelho, verde, amarelo, laranja, índigo, roxa, Preto, Branco, e até tomates listrados.
Uau! Entendeu? Existem bastante de opções lá fora!
Se você pudesse usar alguma ajuda para classificar as inúmeras opções, estamos protegendo você. Sinta-se à vontade para consultar nossos artigos para recomendações úteis detalhando as vantagens de alguns dos melhores cultivares de herança , nosso variedades híbridas favoritas , e a tipos mais adequados para enlatados .
Mas se você não está com vontade de tomar decisões (eu sei como é, todos nós temos nossos momentos) e queremos apenas uma recomendação, Eu tenho um para você.
Sugiro um dos meus favoritos herança cultivares, o lindo ‘Cherokee Purple . 'Este é um tomate estilo bife com bonito, pele vermelho-arroxeada que permanece verde ao redor do caule.
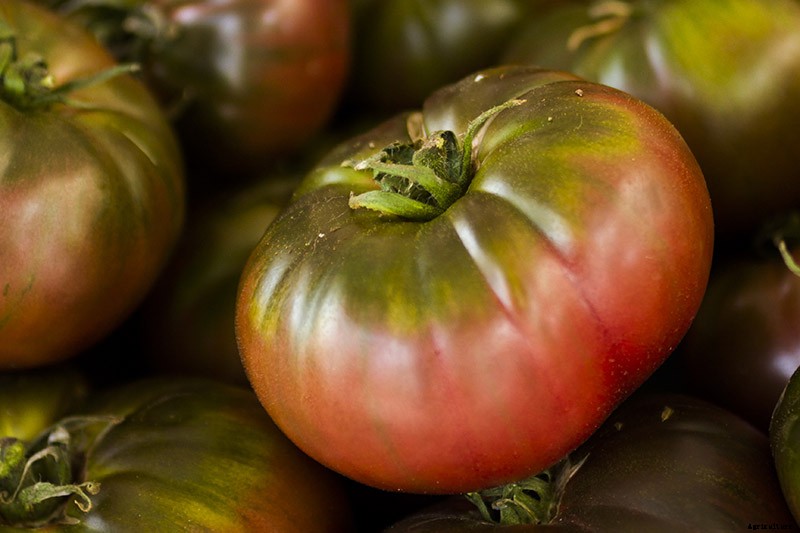
As frutas grandes podem pesar até 1 quilo cada, e tem denso, carne suculenta. Fornecendo uma mudança em relação às variedades vermelhas típicas, a carne deste é escura, com sementes rodeadas por gel verde.
Eu confesso - quando eu corto um desses, Eu fico hipnotizado por suas cores.

‘Cherokee Purple’
O sabor desta herança é doce e um pouco enfumaçado, pronto para adicionar brilho e uma profundidade intrigante às suas refeições de verão.
Se "Cherokee Purple" tenta tanto seu paladar quanto seu amor pela jardinagem, você pode encontrar pacotes de sementes orgânicas certificadas disponível em Eden Brothers .
E se você está se perguntando quantas plantas crescer, Eu recomendo começar pelo menos seis de cada variedade - o número de células em uma bandeja inicial típica.
Se você fosse apenas plantar 1 semente de tomate e não germina, você ficará desapontado e se perguntará o que foi que você fez de errado, enquanto pode ser que a semente individual não seja viável.
Com sementes, queremos maximizar nossas opções!

Algumas variedades têm uma taxa de germinação mais baixa - e os vendedores de sementes nem sempre imprimem essas taxas de germinação nos pacotes de sementes, então você nem sempre saberá o que esperar em termos de germinação.
Plantar alguns extras irá ajudá-lo a compensar quaisquer perdas, particularmente com tipos conhecidos por terem taxas mais baixas de germinação bem-sucedida.
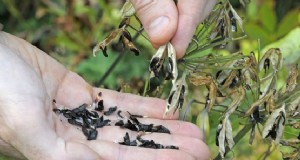
E, aliás, se você tem alguns pacotes velhos de sementes de tomate por aí e está se perguntando se eles ainda podem ser usados, verifique a data no pacote. Se armazenado corretamente, em um seco, Sombrio, e localização legal, elas vão permanecer viável por cinco anos após a colheita.
Mix Inicial
Para semear suas sementes, você pode usar terra para envasamento ou uma mistura inicial sem solo - verifique o pacote para ter certeza de que o solo ou mistura inicial está estéril.
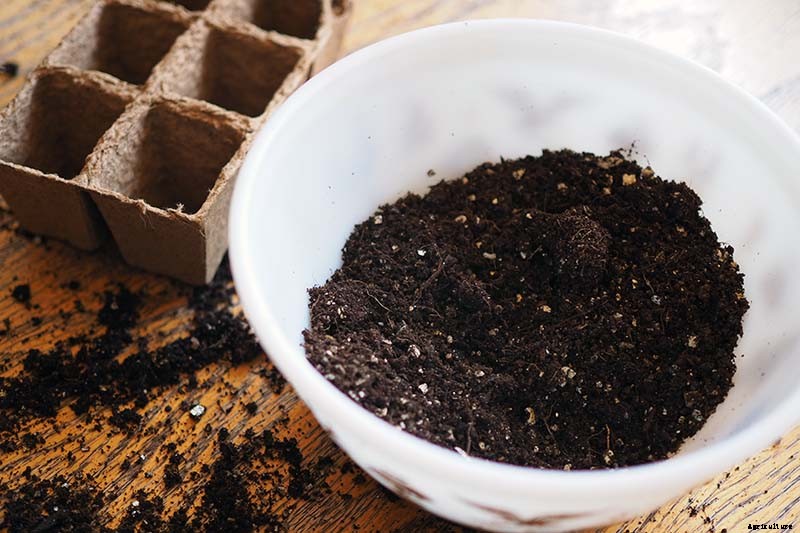
O solo regular do jardim que não foi esterilizado pode comprometer a saúde dos seus jovens tomateiros, potencialmente introduzindo patógenos prejudiciais, como aqueles que causam amortecimento.
Se esta condição ocorrer, você notará que as hastes começam a dourar logo acima da linha do solo. As hastes vão murchar, e as plantas jovens entrarão em colapso e morrerão.
Você pode ler mais sobre como proteger seus tomates bebês de amortecimento neste artigo , lembre-se de que começar com meios de envasamento estéreis é sua primeira linha de defesa. (E o próximo é garantir que você não regue demais - mas irei abordar isso em breve.)
Embora as misturas de solo para envasamento estéreis estejam disponíveis comercialmente, a mídia leve em misturas iniciais de sementes sem solo permite que raízes tenras e brotos surjam, e facilita o transplante de mudas.
Eu gosto de usar uma mistura de envasamento sem solo - mas eu sempre procuro por aquelas que incorporam o mais ambientalmente correto coco ao invés de musgo de turfa .
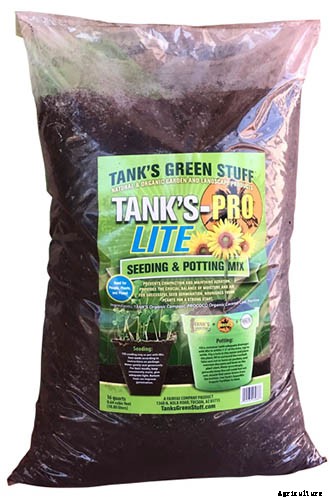
Saco Pro-Lite para Semeadura e Envasamento de 16 Quart
O Pro-Lite Seeding and Potting Mix da Tank é uma dessas misturas iniciais sem solo, e os seus disponível na Arbico Organics .
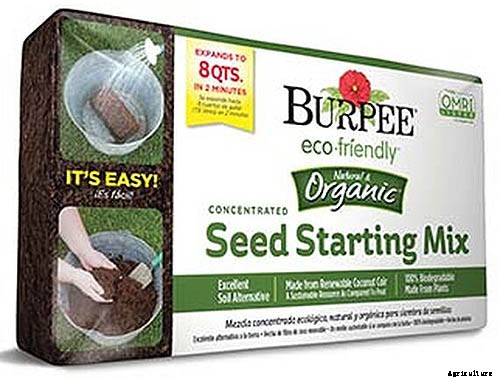
Mistura inicial de semente de coco de coco - faz 8 quartos
Você também pode encontrar uma mistura inicial de sementes de coco orgânico em um local conveniente, bloco de economia de espaço de Burpee . Você só precisa adicionar água e o bloco se expandirá para 8 quartos, pronto para uso.
De acordo com um artigo publicado pela Centro de informações sobre casas e jardins de extensão da Universidade de Maryland , a maioria das misturas iniciais contém fertilizante suficiente para alimentar os tomates até o momento de transplantá-los para o jardim, então você não deve precisar aplicar fertilizante adicional.
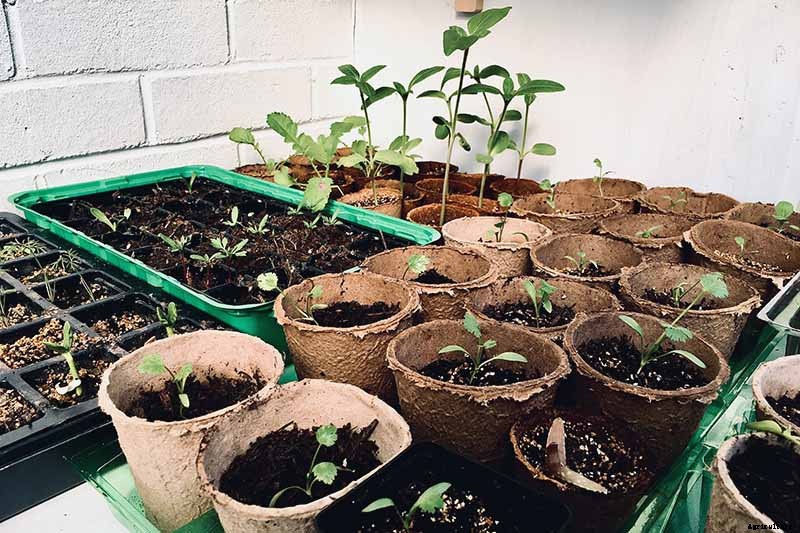
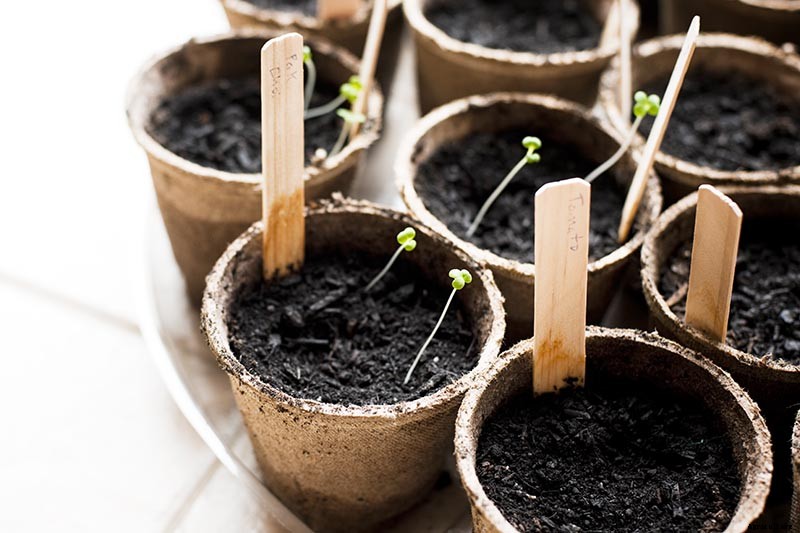
Bandejas iniciais
Você tem muitas opções diferentes no que diz respeito aos tipos de recipientes a serem usados como bandejas iniciais.
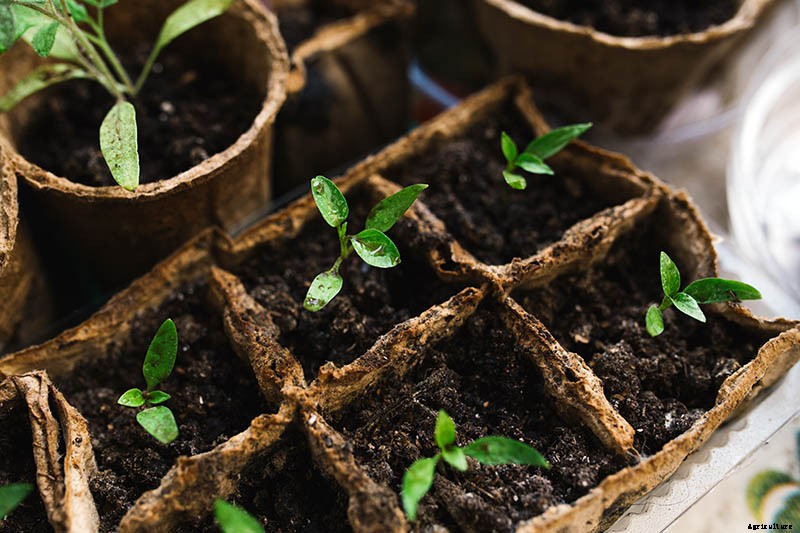
Você pode comprar bandejas de plástico ou biodegradáveis que são projetadas especificamente para o início do cultivo.
Ou você pode reaproveitar caixas de ovos, rolos de papel higiênico, copos de papel ou plástico, ou quase qualquer outro recipiente raso que contenha sua mistura de envasamento.
Qualquer tipo de recipiente que você usa para iniciar suas mudas, certifique-se de que fornece uma boa drenagem - se as raízes dos tomates ficarem muito úmidas, Eles serão mais suscetível a doenças tal como " amortecimento . ”
Certifique-se também de que os recipientes não são muito grandes. Para tomates, é melhor começar com um recipiente menor e transplantar para um recipiente maior quando for necessário, pois o excesso de solo pode ficar muito úmido.
Bandejas de sementes faça você mesmo
Eu tentei os métodos DIY de embalagem de ovos e rolo de papel higiênico anos atrás, e embora a reutilização de criativos ganhe pontos para o meio ambiente, essas não são minhas alternativas favoritas de bandeja inicial.
Caixas de papelão para ovos podem funcionar para começos menores, mas os tomates superam suas células superficiais muito rapidamente.
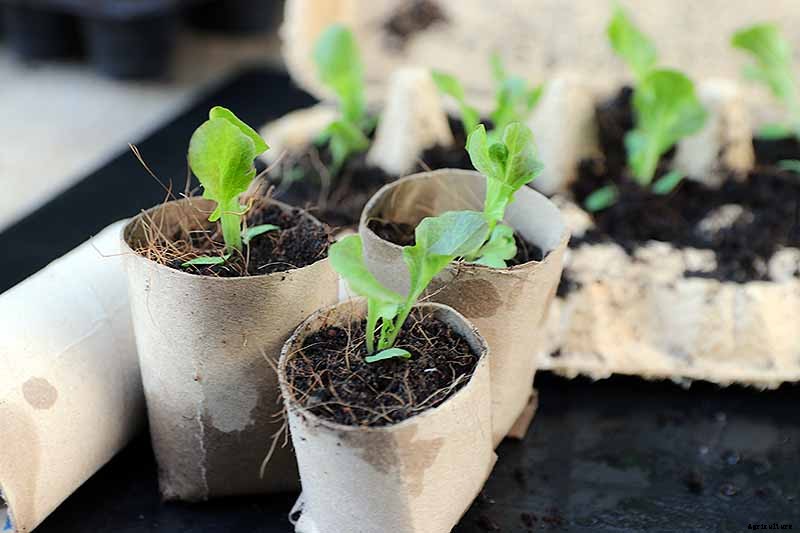
E no ano em que tentei usar rolos de papel higiênico como copos de sementes, eles começaram a se desfazer bem antes de os tomates estarem prontos para o transplante. Eu realmente não posso dar uma recomendação sincera para qualquer uma dessas opções.
Você pode ser criativo e encontrar outros recipientes para começar suas sementes de tomate, mas se você quiser proteger suas apostas, sua melhor opção pode ser comprar bandejas de sementes destinadas a esse fim.
Bandejas de sementes de plástico
Ao escolher suas bandejas de sementes, certifique-se de que sua escolha funcione bem para o seu clima.
No meu clima árido, bandejas e potes biodegradáveis simplesmente não biodegradar - e, sim, Descobri isso da maneira mais difícil. Agora eu fico com bandejas de plástico, que têm o bônus de evitar que minhas rações sequem muito rapidamente entre as regas.
6 bandejas de sementes de células em pacotes de 10
Se o plástico também parece ser a melhor opção para você, essas bandejas de 6 células são uma excelente fonte de jardinagem para o início do cultivo. Cada célula tem 1,5 polegadas quadradas por 2 3/4 polegadas de profundidade - um bom tamanho para suas plantas recém-nascidas.
Você pode encontrá-los em pacotes de 10 bandejas no Burpee .
Reutilizando bandejas de sementes de plástico
Se você está se perguntando se pode reutilizar bandejas e potes de plástico para sementes, a resposta é sim. Apenas certifique-se de lavá-los bem com água quente, água ensaboada, enxágue bem, e depois desinfetá-los.
Eu recomendo um desinfetante à base de peróxido de hidrogênio em vez de alvejante doméstico à base de cloro, uma vez que o cloro pode ser problemático.

De acordo com um artigo publicado pela Jardineiros mestres do condado de Baxter , alvejante de cloro pode danificar suas ferramentas de jardim e irritar ou queimar sua pele, inalar o vapor pode agravar certas condições médicas, e pode ser tóxico para suas plantas se algum resíduo permanecer. Este limpador doméstico realmente não é tão inofensivo quanto podemos pensar, apesar de seu uso generalizado.
O spray fungicida BioSafe Disease Control é uma boa alternativa ao alvejante com cloro. Ele contém peróxido de hidrogênio, por isso é seguro para uso em potes, Ferramentas, e outras superfícies, e vai matar os patógenos que causam doenças nas plantas - incluindo aqueles responsáveis pelo amortecimento - quando usado conforme as instruções.
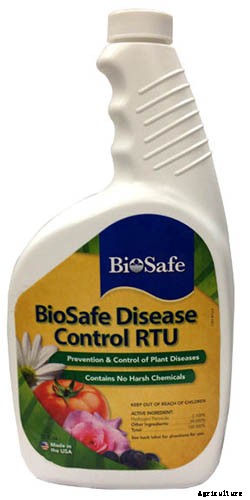
BioSafe Disease Control Frasco spray de 32 onças
Você pode encontrar o BioSafe Disease Control para compra em um frasco de spray de 32 onças na Arbico Organics .
Bandejas de sementes biodegradáveis
Se você vive em um clima temperado, escolher bandejas e potes de sementes biodegradáveis é uma ótima maneira de ir, já que você pode plantá-los diretamente no solo ou no próximo tamanho de vaso de viveiro sem perturbar as raízes delicadas de sua planta.
No que diz respeito a bandejas e potes biodegradáveis, Eu recomendo altamente CowPots ™, uma opção mais ecológica do que aqueles feitos de turfa.
CowPots ™ são feitos de esterco de vaca compostado proveniente de uma fazenda leiteira de Vermont - e eles não apenas têm uma pegada ambiental leve, uma vez que reutilizam o material residual, uma vez que você os planta, eles vão nutrir suas plantas à medida que se decompõem.
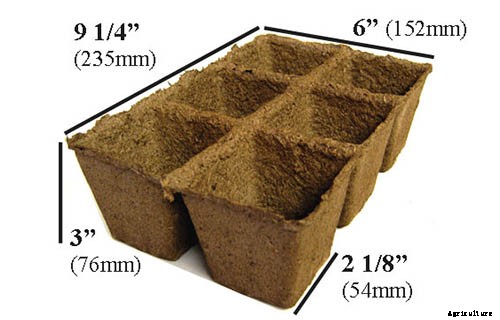
CowPots ™ # 3 Six Cell Flat
Você pode encontrar bandejas CowPots ™ de 6 células em embalagens de várias quantidades na Arbico Organics . Cada célula na bandeja tem aproximadamente 3 polegadas quadradas por 3 polegadas de profundidade.
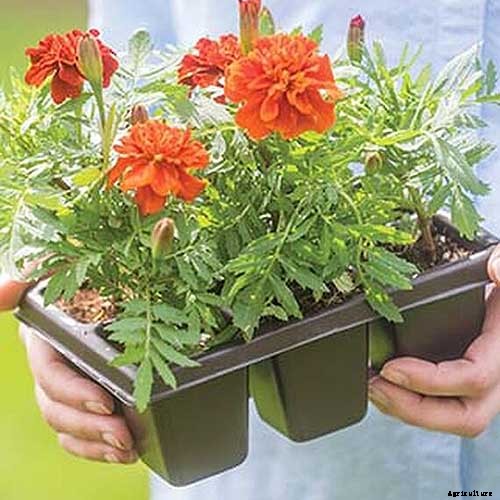
Potes de berçário
Os tomates podem crescer rapidamente, portanto, ter vasos de viveiro de tamanho maior à mão para replantar também é uma boa ideia.

Usei com sucesso potes de plástico e copos de papel para essa finalidade.
E assim como as bandejas de sementes biodegradáveis mencionadas acima, CowPots ™ também estão disponíveis em tamanhos maiores para repotting.
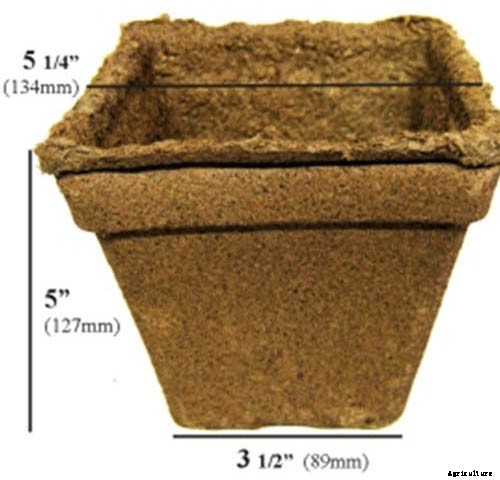
CowPots ™ # 5 Square
Você pode encontrar CowPots ™ quadrados de 5,25 por 3,5 por 5 polegadas em embalagens de 60 ou 192 potes na Arbico Organics .
Ou talvez os potes de plástico sejam mais adequados às suas necessidades?
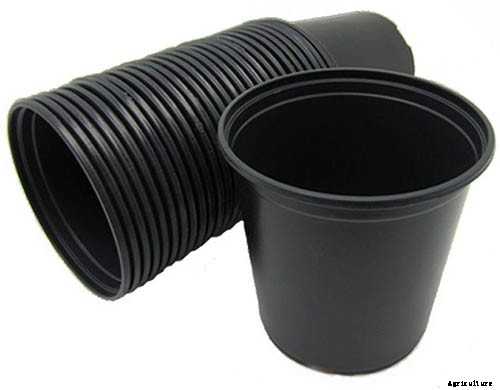
Pacote de 20 potes redondos de berçário
Você pode encontrar pacotes de 10 ou 20 potes de plástico para bebês, medindo 7 polegadas de largura por 6 3/4 polegadas de profundidade, na Home Depot .
Estação de Germinação
Para germinação, os tomates requerem calor e alta umidade - condições que criam um efeito estufa. Em outras palavras, eles precisam de uma estação de germinação quente e úmida.
Existem algumas opções que você pode escolher para criar um ambiente úmido, ambiente quente para seus tomates - e suas opções variam desde o orçamento extremamente baixo até o sério investimento em jardinagem de longo prazo.
Envoltório plástico
Se você quiser manter seus gastos baixos neste projeto, você pode criar condições de estufa cobrindo suas bandejas de sementes com filme plástico.
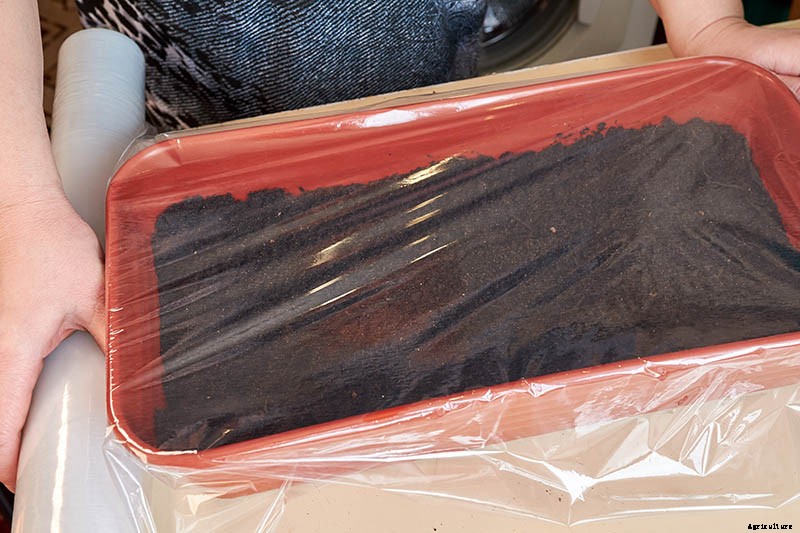
Se você decidir ir por esse caminho, certifique-se de deixar um pouco mais de espaço entre a superfície do solo e o topo das bandejas de sementes, para que os tomates bebês não batam imediatamente com a cabeça no plástico assim que brotam.
E lembre-se de remover o filme plástico logo após seus brotos enfiarem suas cabeças acima do solo, para garantir a circulação do ar e reduzir o risco de amortecimento.
Bandejas de cultivo abobadadas
Uma bandeja de cultivo abobadada é uma opção bastante barata para o início do cultivo, especialmente se você não tiver certeza de que deseja investir em equipamentos a longo prazo.
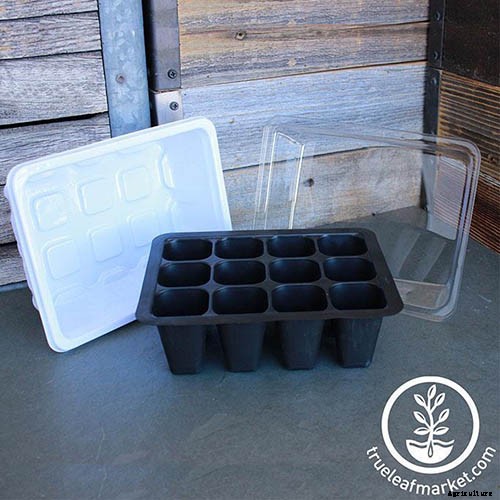
Bandeja de cultivo de 12 células com cúpula de umidade de plástico
Essas estações de germinação vêm com uma superfície plana para segurar suas bandejas de sementes, e uma cúpula de plástico para reter o calor e a umidade.
Você pode encontrar uma bandeja de cultivo de 12 células com uma bandeja de gotejamento e cúpula de umidade transparente do True Leaf Market .
Terrário
I grow my starts in a terrarium – a mini greenhouse – placed next to a sunny and warm south-facing window.
My young tomatoes get plenty of warmth and humidity this way – and they are protected from my curious cats.
While I have a couple of repurposed reptile terrariums that I use, my favorite terrarium is a more decorative model.
It has more ventilation and doesn’t stay quite as humid as the reptile terrariums, but I have had no problem germinating and growing tomato starts in it.
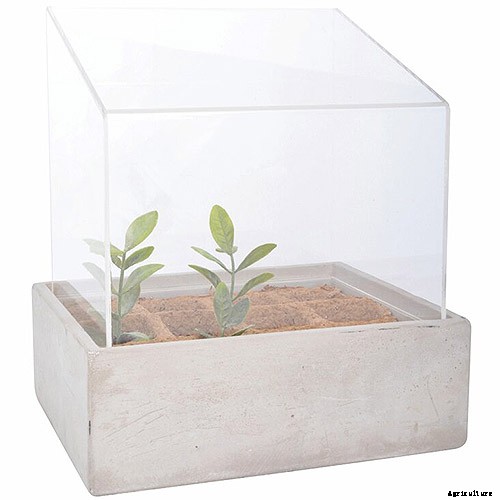
Lean-To Roof Terrarium – Available from Wayfair
Mine is from Ikea, and a model like this can also double as a display case for succulents when you’re not growing veggies. And you can find it for purchase at Wayfair .
Cold Frame
You don’t have to start your tomatoes indoors – you could start them in a cold frame instead, if your temperatures are right.
This setup works particularly well if you receive a lot of warming sunshine in the spring, but not so well if your spring weather is gloomy and rainy, ou muito frio.

A cold frame will work if you can keep the interior conditions between 50 and 95°F, with the best temperature range for germination being between 65 and 85°F .
Set up your cold frame facing full south where it will get direct sunlight, providing your young starts with both light and heat.
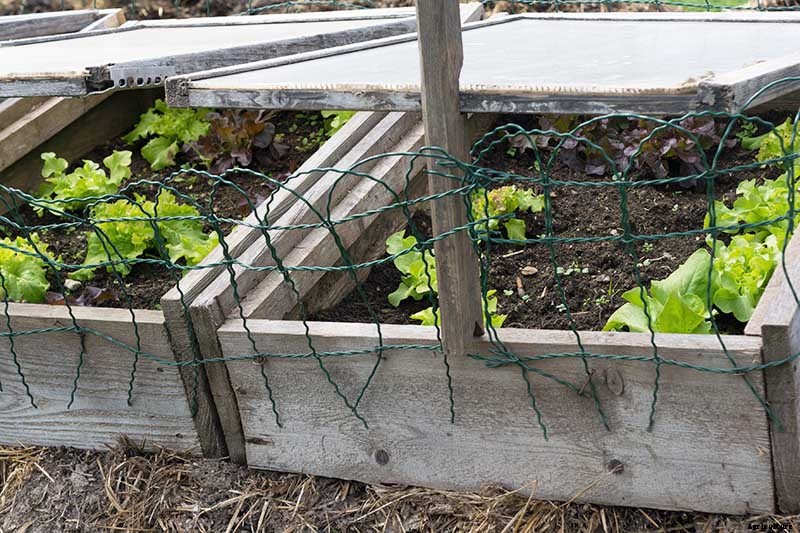
You can read about making your cold own frame in our article on some of the best DIY greenhouses and cold frames for your backyard .
Cold frames may come with built-in ventilation, or you can prop them open to ventilate and prevent interior temperatures from getting too hot during the heat of the day.
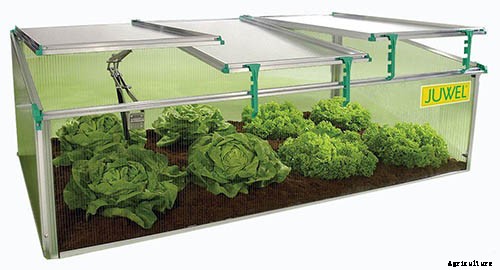
Juwel 59″ Vented Cold Frame
If a cold frame seems like the best option for you, you may want to try this 59-inch vented polycarbonate model from Juwel. It’s available da Home Depot .
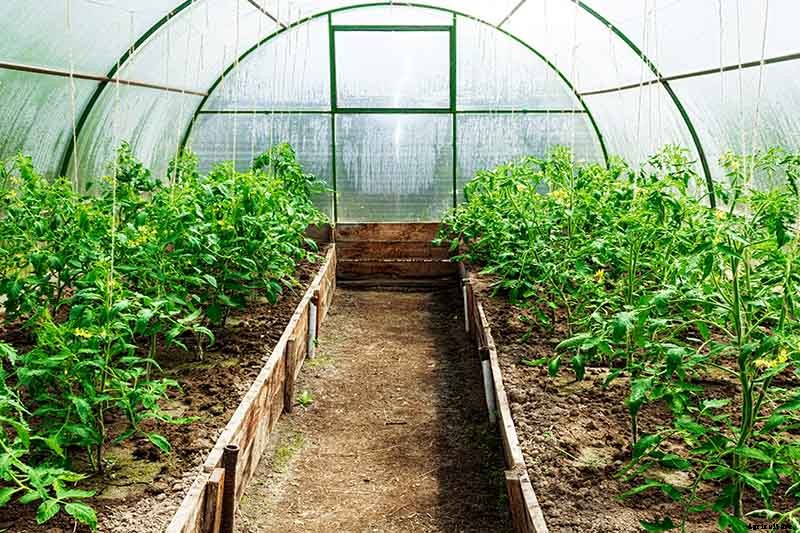
Greenhouse
If you want the best setup of all for growing your own tomatoes from seed, a greenhouse is the ultimate choice – and will give you the space to start an endless selection of cultivars of your favorite summer veggies.
If you’re lucky enough to already have a greenhouse as part of your gardening setup, growing your starts in your greenhouse is definitely the way to go, since you can use it to provide the light, aquecer, and humidity they need.
Just make sure you avoid the most common greenhouse mistakes – read our helpful article on this subject to learn more.
If the idea of setting up a greenhouse has your green thumb twitching, you might consider making a DIY greenhouse out of pallet racking .
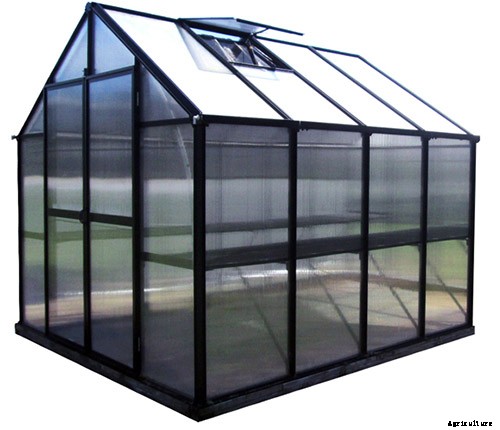
Monticello Greenhouse
Or have a look at this selection of aluminum and polycarbonate Monticello brand greenhouses, available for purchase da Arbico Organics .
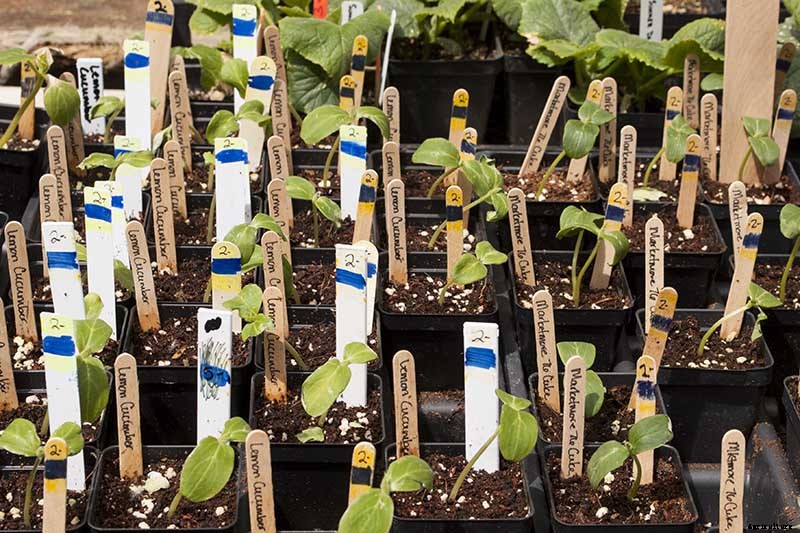
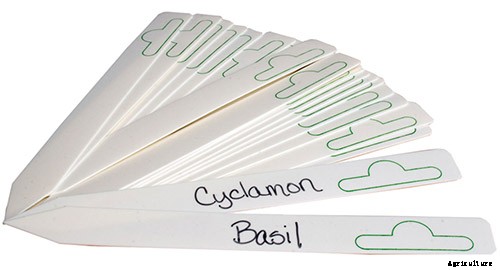
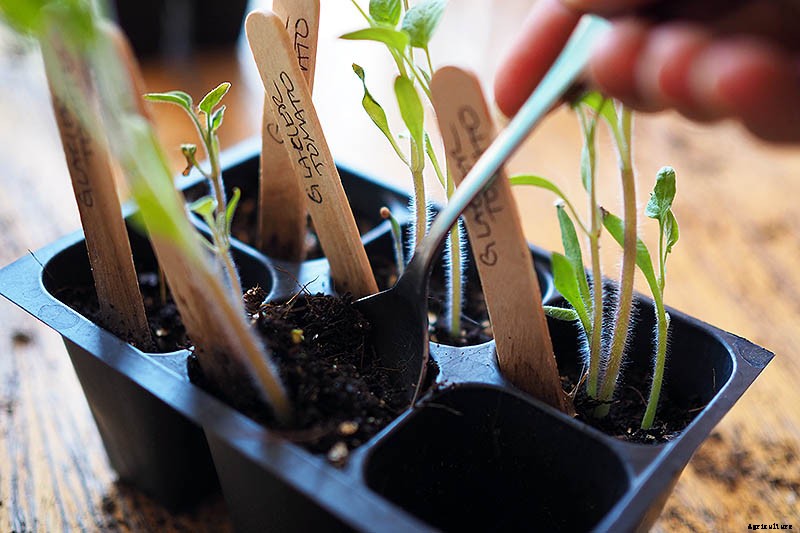
Plant Markers
Plant markers are a must have if, like me, you plan to start your own personal mini nursery each spring, growing several different varieties of tomatoes as well as many other types of vegetables and herbs.
Without markers to label them all, how will you keep track of your starts?
If you are only starting one variety of tomato and no other types of veggies, you can probably get by without plant markers.
And if you are using something like egg cartons or paper cups to grow in, you could just write the name of your plant and the date directly on the container.
Contudo, using plant markers gives you a clear visual sign of what variety you are growing and the date seeds were sown (excellent items to note in your gardening journal , as well).
You can make your own plant markers out of used popsicle sticks, or you can buy markers intended specifically for this purpose – made either out of metal, Madeira, or plastic.
While the wooden ones are biodegradable, the plastic ones have more reuse potential since they don’t break down as quickly, and you can wash off the writing.
Pack of 50 Jump Start 6” Plant Markers
You’ll find a pack of 50 reusable 6-inch plastic markers da Arbico Organics .
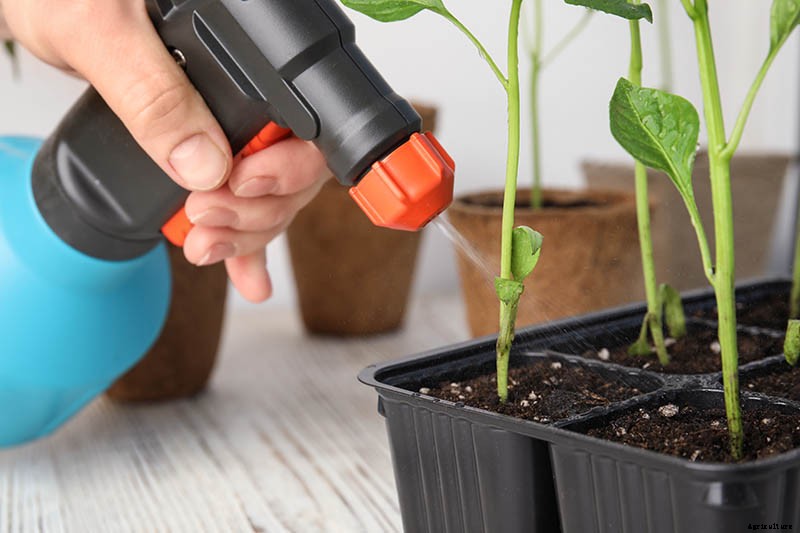
Spray Bottle
While you can water your seedlings with a small watering can, jarra, teapot, cup, or whatever else is handy, using a spray bottle will give you much greater control over how much irrigation you are providing, and help to prevent overwatering.
Na verdade, correct watering is such an important aspect of growing tomatoes from seed that I consider a spray bottle to be just as important to have on hand as a good quality starting medium.
There are a couple of reasons why watering in this manner is preferred.
According to Barbara Larson, Unit Educator at the Extensão da Universidade de Illinois , the first is that overly wet potting mix can promote fungal disease. Waterlogged soil may also remain too cool after watering, preventing seed germination and slowing root growth.
You can use a plain plastic spray bottle, or a glass one. If you plan to repurpose an empty household spray bottle, only select one to upcycle that has never contained harsh chemicals, since chemical residues can damage your starts.
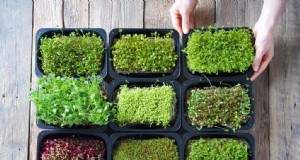
A spray bottle designated for watering only is great to have on hand anyway, if you have houseplants that need misting or if you grow microgreens .
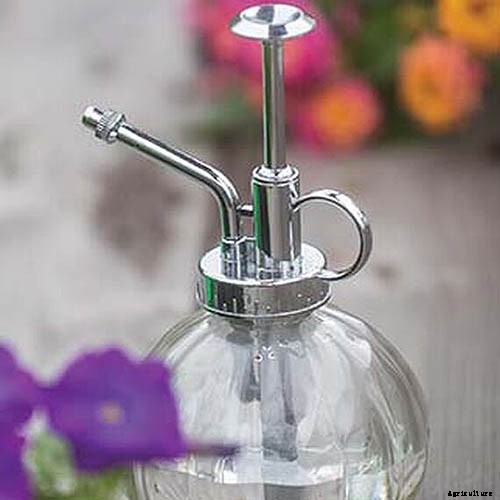
Clear Glass Seedling Mister
I love these seedling misters de Burpee . They produce a gentle mist ideal for watering your delicate shoots and are available in clear glass or green metal.
Widger
When removing your young tomatoes from their trays to transplant, you will need some way to lift them out without pulling them by the stems. A widger is one such tool you can use to perform this task without injuring your baby plants.
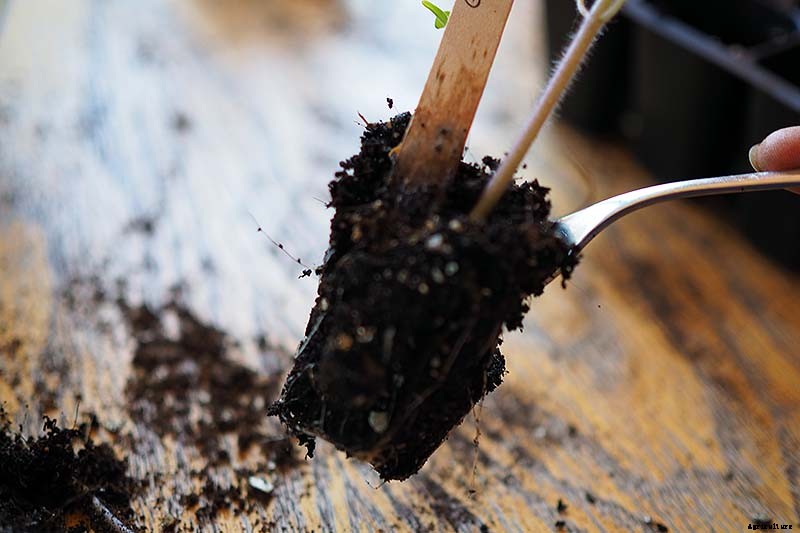
To use this tool, you stick the widger into the soil and under the roots of the seedling to lift it out of its tray – without damaging its roots.
As a DIY alternative, you could also use a small spoon, a popsicle stick, or a wooden plant marker to leverage your plant out of its growing cell.
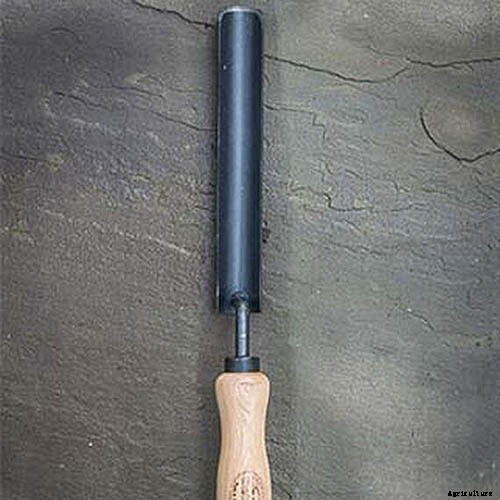
Widger, or Transplanting Tool
But if you want to take your gardening game up a notch with a more professional tool, you’ll find a tempered boron steel widger disponível no Burpee .
Grow Lights
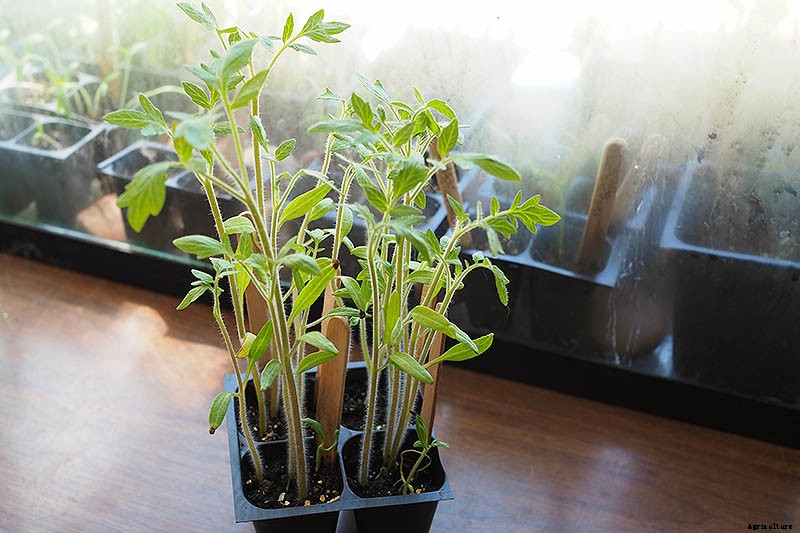
I grow my seedlings next to a couple of very sunny, south-facing windows. These provide plenty of sunlight and warmth for my plants as they grow and mature.
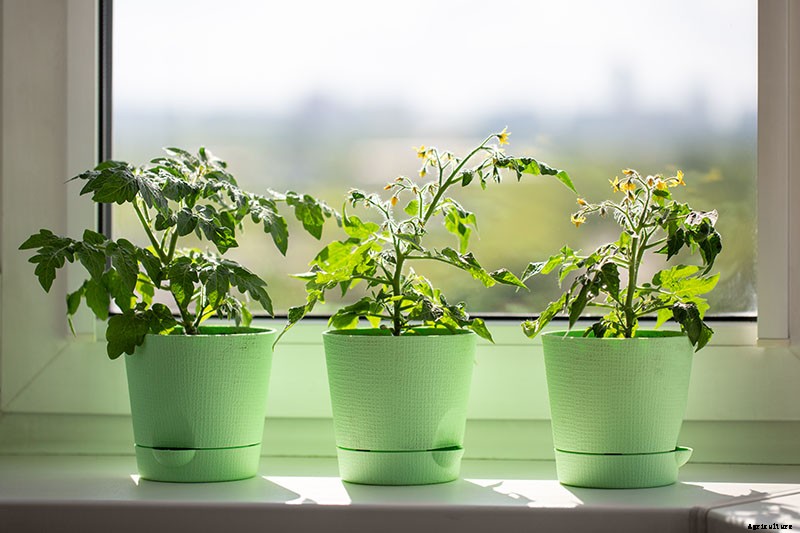
But not all climates or home situations will allow you to take advantage of free light and heat from the sun. Então, if you are facing such challenges, you might want to consider using grow lights.
Grow lights have an additional advantage, even if you do have a nice sunny window:
Since they are placed just a few inches above the growing plants, plants will grow stockier and bushier compared to their growth next to a window.
Grow lights also encourage plants to grow straight up towards the overhead light source instead of leaning.
Plants grown next to a window often reach sideways towards the sun – a problem that can be remedied by rotating your plants regularly.
But they do tend to grow leggier even with regular rotation, as they reach toward the light.
Para learn more about grow lights , have a look at our article on some of the best models available and how to use them.
Heat Mat
A heat mat can help to keep the soil at the right temperature for germination. Having one of these is particularly useful to gardeners in cold or rainy climates, where you can’t rely on the sun to keep your young plants at the right temperature.
And do you remember what the right temperature is?
That would be 65-85°F for germination.
According to Barbara Lawson at the Extensão da Universidade de Illinois , lowering the temperature after the first set of true leaves appear helps to promote shorter and stockier growth with stronger stems.

Jump Start Windowsill Heat Mat
If it sounds like you could use a heat mat to help regulate the temperature in your growing operation, the Jump Start Windowsill Heat Mat will warm your plants’ roots 10-20°F higher than the ambient room temperature.
Você pode encontrá lo na Arbico Organics .
6 Steps to Growing Tomato from Seed
Now that you have all your supplies gathered up, you’re almost ready to start your tomatoes.
There’s just one more important step to take care of before you get your hands dirty:
Getting the timing right.
1. Know When to Sow
It’s important to know when to start your tomato seeds, in order to plant them out at the best time and get the best harvest.
The best time to transplante these summer veggies is a couple of weeks after your average last frost date.
Planting a couple of weeks after this date helps to provide a little wiggle room in case a freak late frost decides to sweep through your area.

Primeiro, determine the average last frost date for your area.
If you don’t already know it, you can look it up at the Old Farmer’s Almanac . Just type in your zip code and the tool will calculate your average last frost date and display it on the screen. Fácil!
Most seed packets recommend starting tomato seeds 4-6 weeks antes your last frost date, but they assume you will set out your transplants close to this date. We’re going to be a bit more cautious than that.
If you get started just 4 weeks before your last frost, then your starts should be ready for transplanting 2 weeks depois de your last frost. Make sense?
Então, take your last frost date and count back 4 weeks. This is when you should begin your tomato seed starting project.
Learn more about when’s the best time to sow vegetable seeds indoors and outdoors in this helpful guide.
2. Prepare Trays and Sow Seeds
Now you’re finally ready to get started, so let’s go.
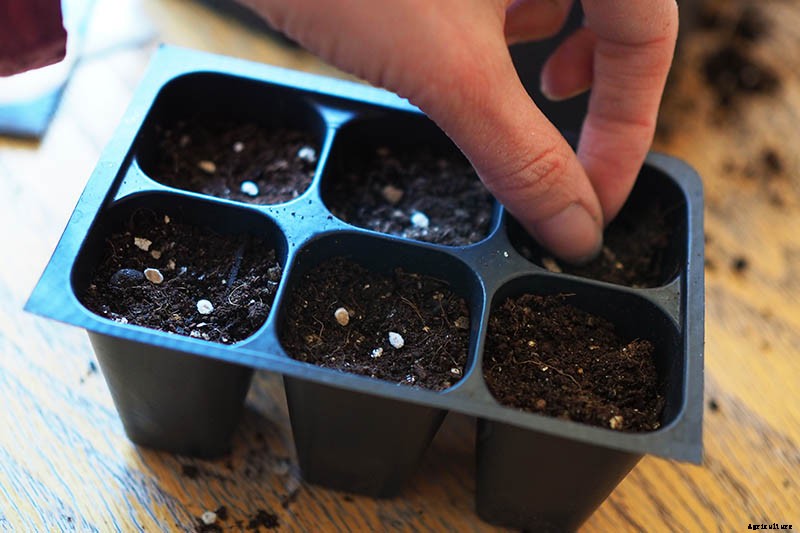
Place some starting mix in your seed trays. Fill each cell loosely, then gently tap the tray to remove any air pockets.
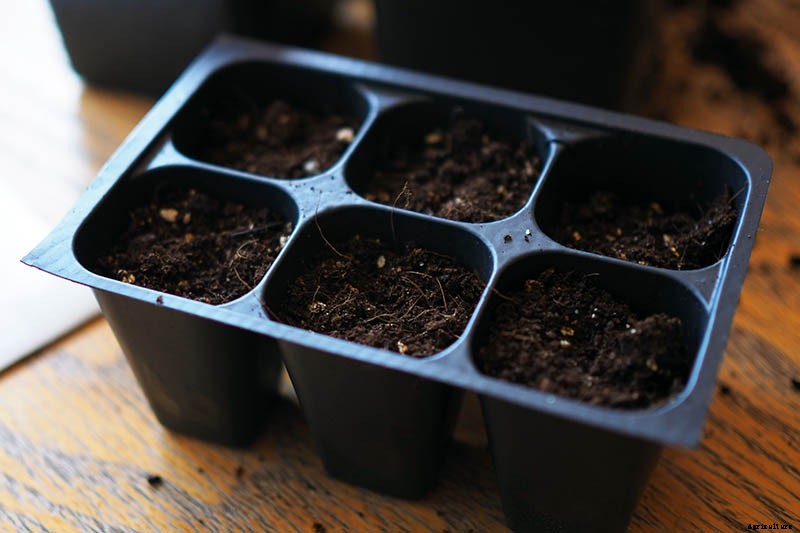
You want the soil to fill in the cells without becoming compacted. Loose soil will allow your plants’ roots to spread out nicely, but compacted soil will not.
Gently smooth the surface of the soil to make it level. Leave 3/4 of an inch of head space at the top of the cells, above the soil line.
Sow Seeds
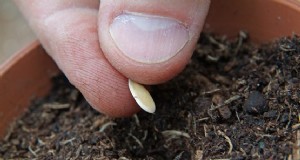
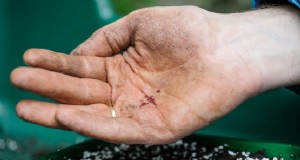
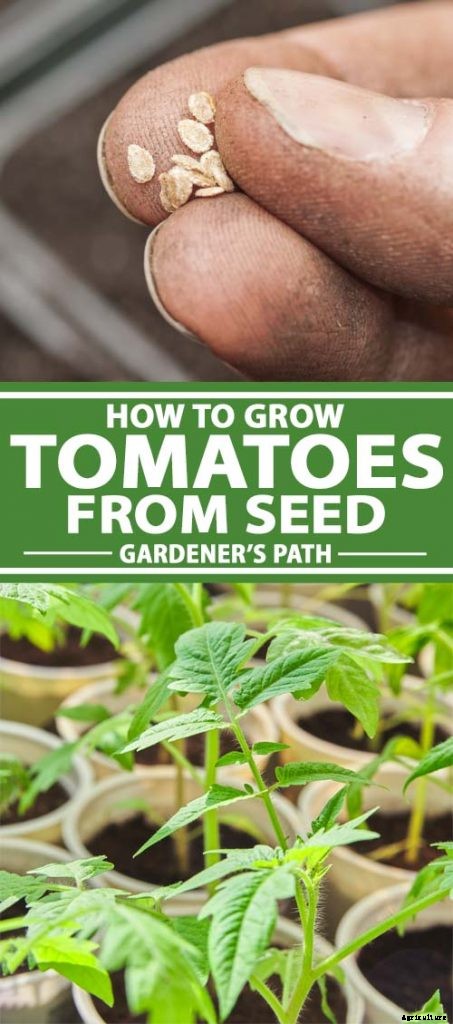
Shake out some seeds from your seed packet into your hand.
To make up for any that may not germinate, plan to sow 2-3 seeds per cell.
Place one seed on the surface of the soil, and repeat with the others, spacing them out an equal distance from each other.
Grab a pinch of sterile planting medium and sprinkle it over the seeds – cover them with about 1/4 of an inch of starting mix.
Agora, gently pat the surface of the soil to smooth it.
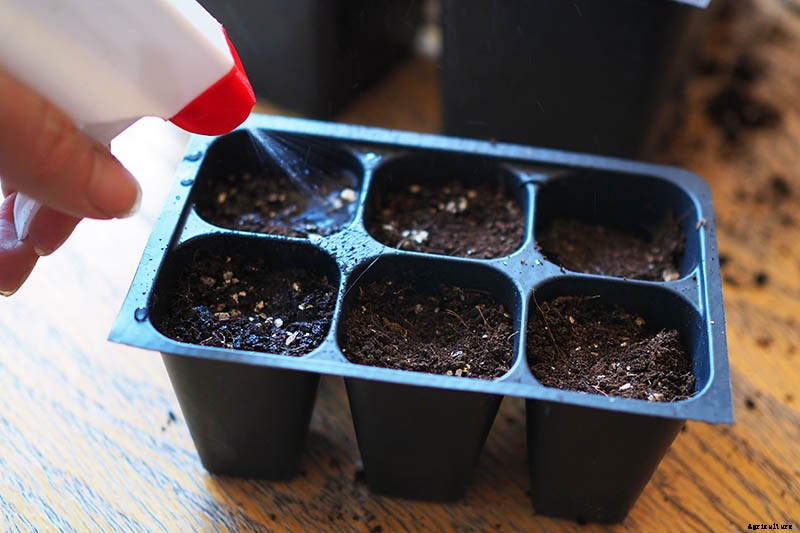
Water Gently
Water your seeds in with your spray bottle, spraying until the soil is moist, mas não alagado. Para mim, this means about 4 or 5 squirts.
When your plants get larger, after repotting, you will want to water more thoroughly, with a small watering can or teapot.
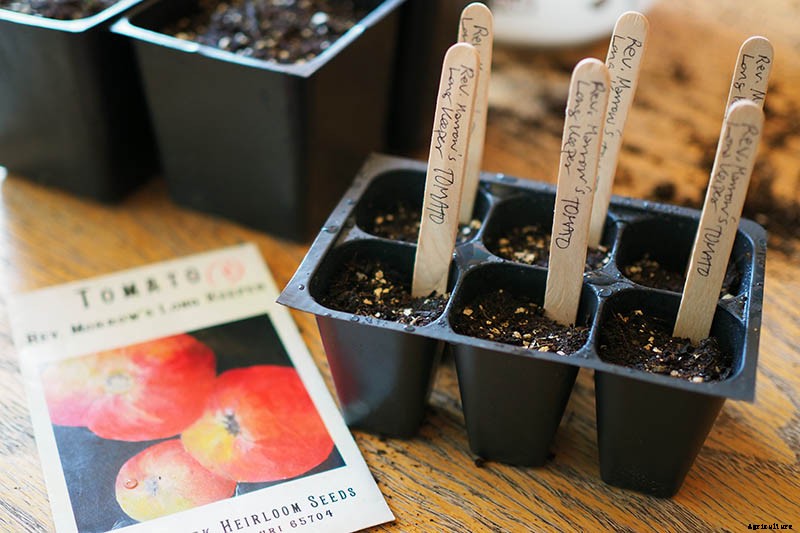
Write the name of your variety and the date seeds were sown on as many seed markers as you need, and stick them in the tray along the edge of the cell, away from where you placed your seeds.
3. Move to the Germination Station
Place your seed trays in their warm and humid growing location – your “germination station” – whether this is your greenhouse, quadro frio, terrarium, grow dome, or just under some plastic wrap.
If your seed tray is placed next to a warm window, you may not need a heat mat. But if you do need extra heat to maintain the soil in your trays at the recommended 65-85°F, place a heat mat underneath them.
You won’t need to expose your trays to light until the tomatoes sprout. Though some types of seeds require light for germination, tomatoes do not.
Check your trays once or twice a day, and water with your spray bottle when the surface of the soil is dry.
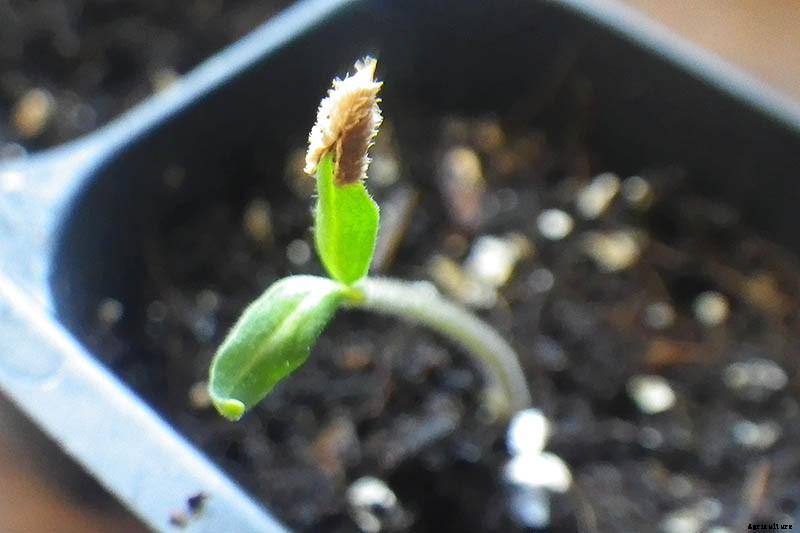
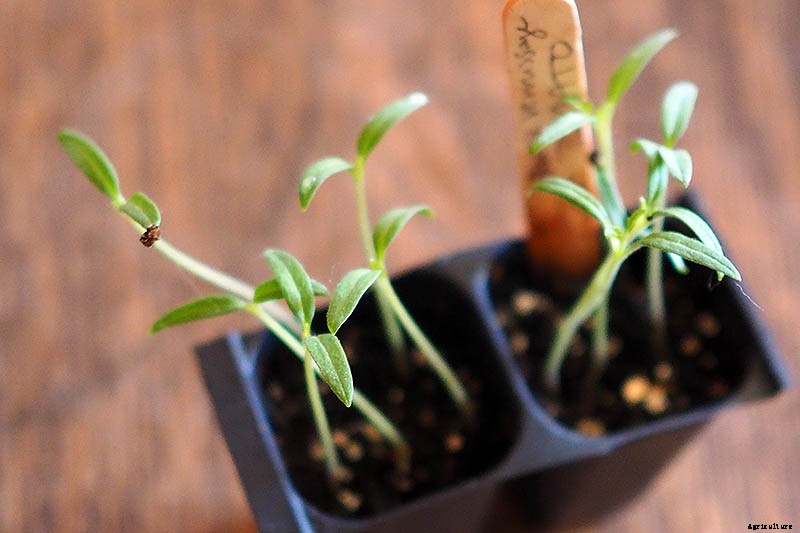
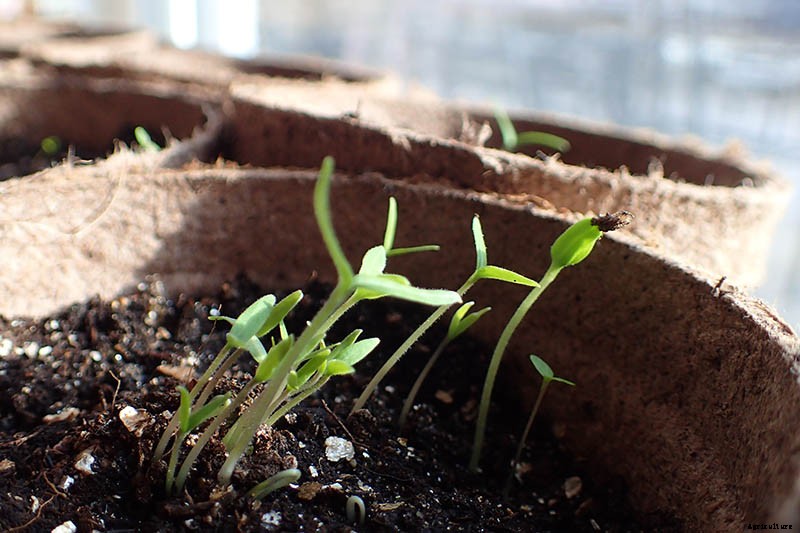
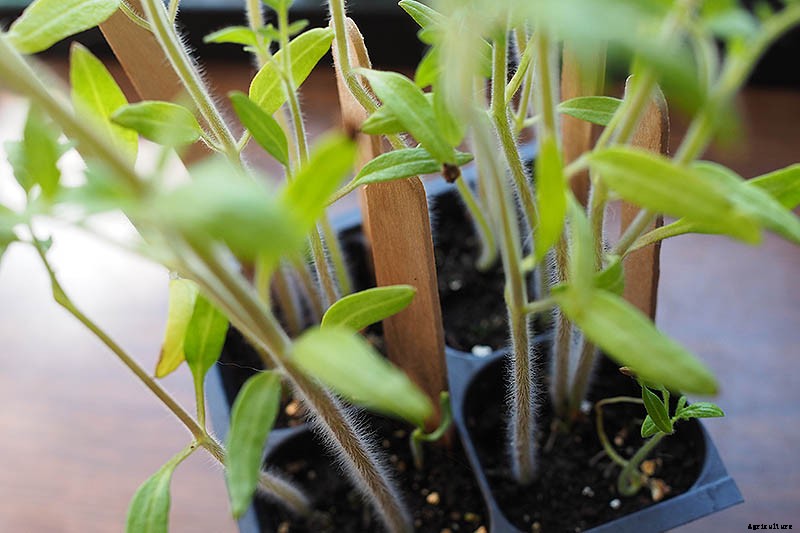
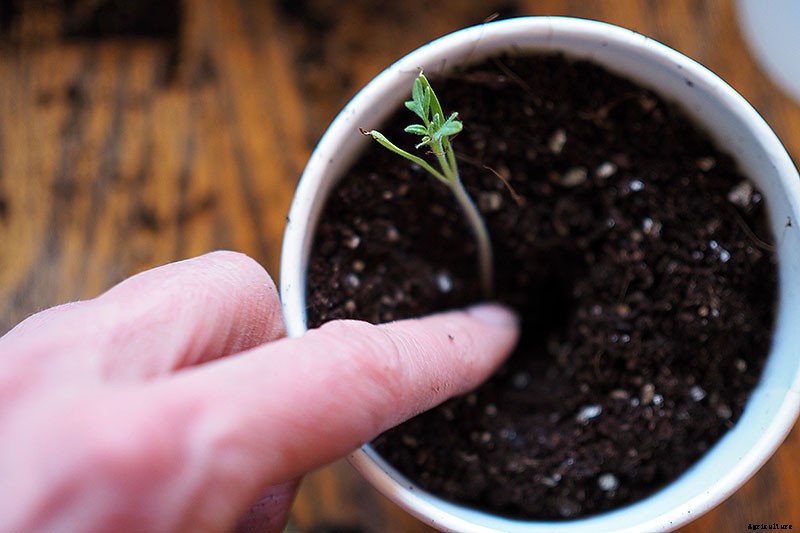
Within a week or two, germination will take place. Tiny seedlings will rise out of the soil, perhaps holding the seed cases they just emerged from aloft on one of their seed leaves, or cotyledons.
If you used plastic wrap over your seed trays, remove it now.
Provide Light
Make sure you are ready to provide light to your newly emerged tomatoes – whether it’s sunlight from a bright, southern window or artificial light from a grow light.
If you are using a grow light, place it 2-3 inches above your starts.
When using a window for light, your plants will lean towards the window. To correct for this and get your plants to straighten out, rotate your seed trays every few days.
If your “germination station” is a greenhouse, quadro frio, terrarium, or domed tray, you can leave your plants there to grow.
4. Daily Care of Your Seedlings
You will need to care for your young tomatoes every day.
- Water once or twice a day with your spray bottle when the surface of the soil is dry.
- When starts are bigger and require more water, switch to a small watering can or teapot.
- Ventilate your germination station so it doesn’t get too hot. Interior temperatures over 95°F will stunt growth.
Opcionalmente, you can expose your young tomatoes to the breeze of a gentle fan, or gently brush your hands over their leaves a few times a day. The purpose of this is to simulate wind and help strengthen their stems.
Thin Your Starts
If the majority of your seeds germinate and you end up with two or three plants growing in each cell of your tray, you may need to thin them.
If your seedlings are getting big and their roots are getting tangled, it’s best to sacrifice some of them and keep only the strongest plant in each cell.
If you will be repotting your seedlings in the next step, you can thin them at the same time.
The safest way to do this to avoid disrupting the roots of your remaining plant is to use a small pair of scissors to snip the stems of the rejects, just above the soil line.
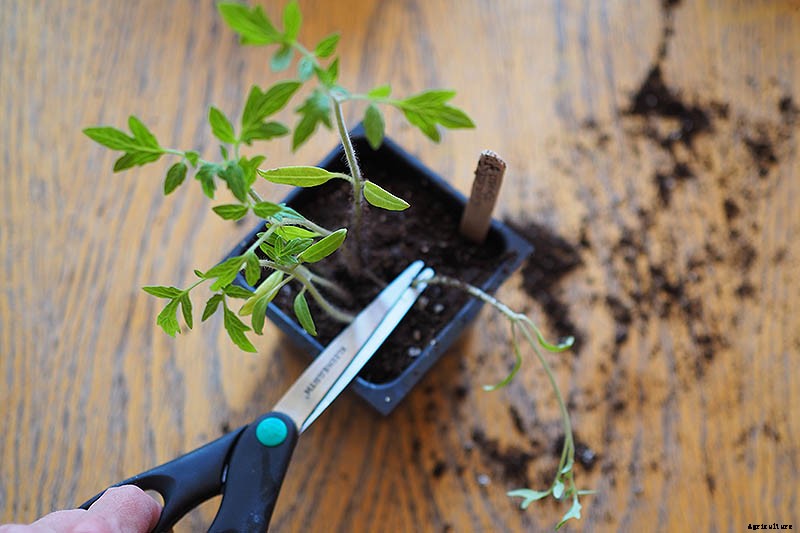
Continue snipping until you have just one strong tomato seedling remaining in each cell.
If seedlings are not overly crowded when you’re ready to repot or transplant into the garden, and all of them look strong and healthy, you should be able to gently remove each of them from the soil for repotting without culling any.
5. Repot and Harden Off
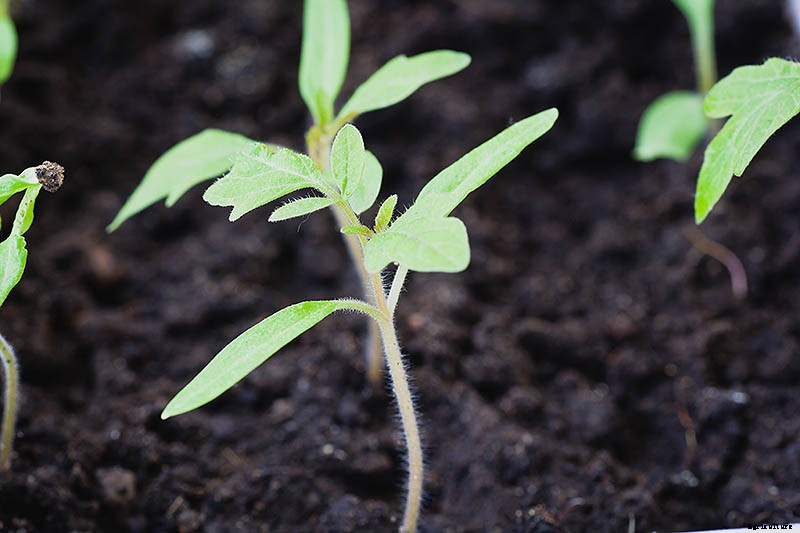
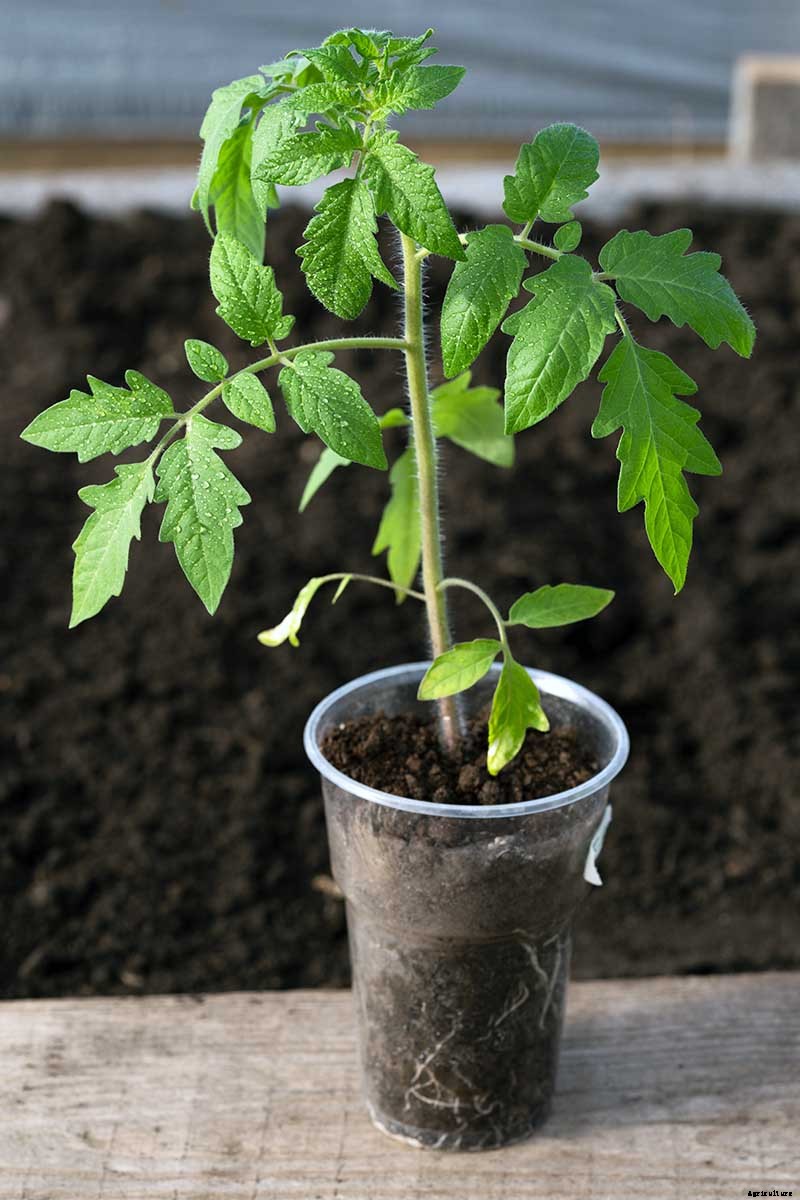
Once your baby tomatoes have at least two or three sets of true leaves, they can be transplanted into larger sized nursery pots – unless you are ready to transplant them directly into the garden or their summer containers .
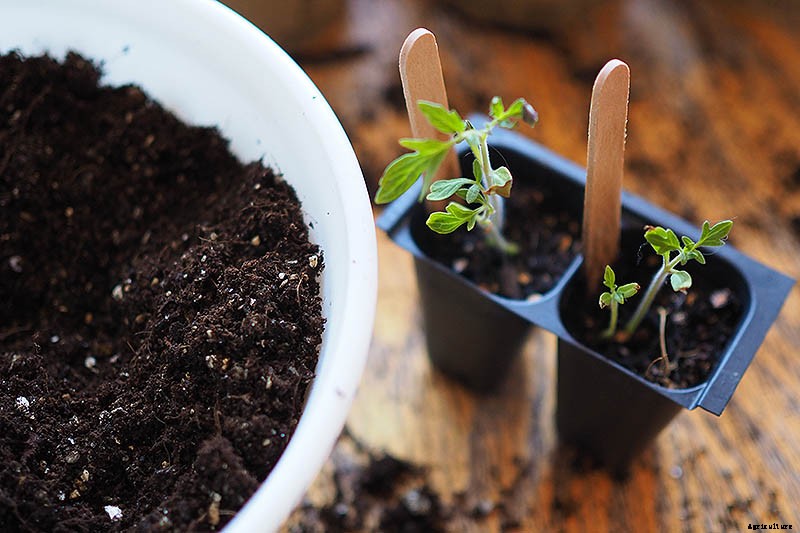
Repotting will give your tomatoes more room for root growth.
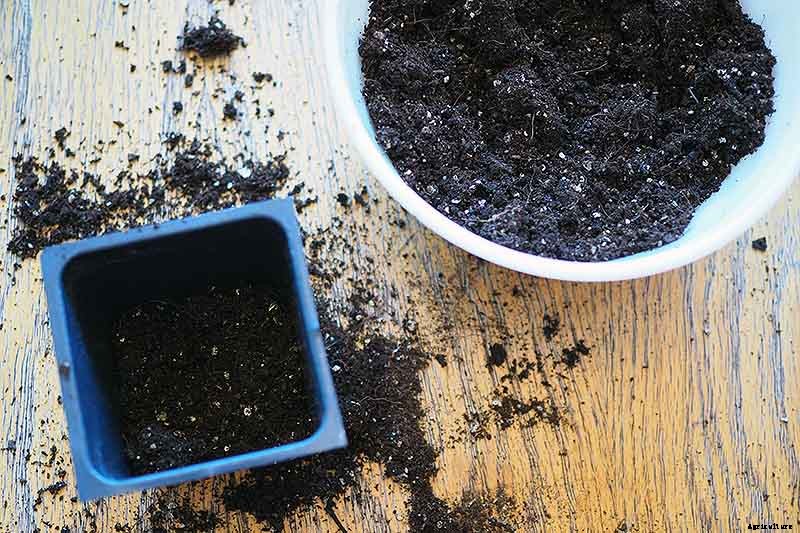
Prepare your nursery pot. Fill it halfway with potting mix. Tap the pot to let the soil settle, but not so much that it becomes compacted.
Repotting from Biodegradable Seed Trays
If you started with a biodegradable tray, use a pair of scissors to cut the cells apart so you have separate pots to plant.
Trim down the rim of each cell so it is level with the soil.
Place a biodegradable tray cell directly into the larger sized pot, being careful not to tear it. Add potting mix so it’s level with the soil of the transplant. Repeat with the rest of your seedlings.
Repotting from Non-Biodegradable Seed Trays
Gently remove tomato seedlings from the tray one at a time with a small spoon or widger. Place the spoon as far down into the cell as possible to avoid damaging the roots.
Pull up with the spoon – your tomato should be freed from its first container!
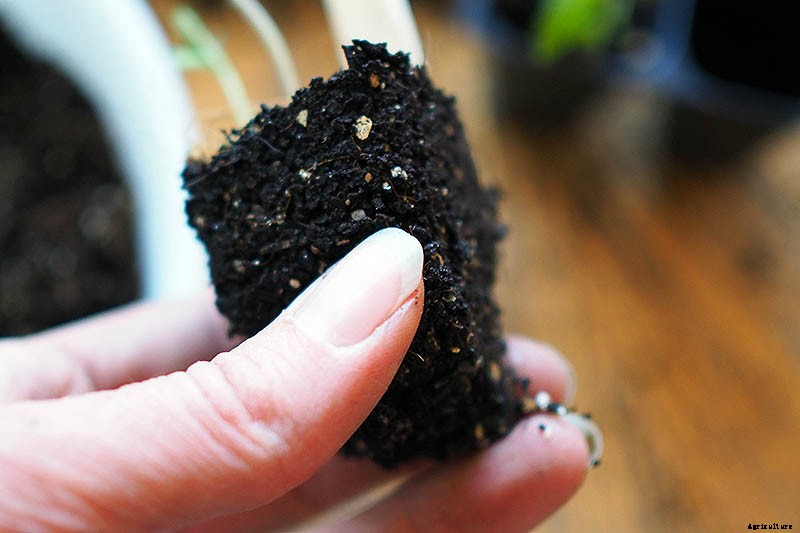
Hold the soil instead of holding the seedling by its stem, which is susceptible to disease if it’s accidentally bruised or damaged.
Bury Your Stem
Now you’re ready to place your tomatoes into their new pots.
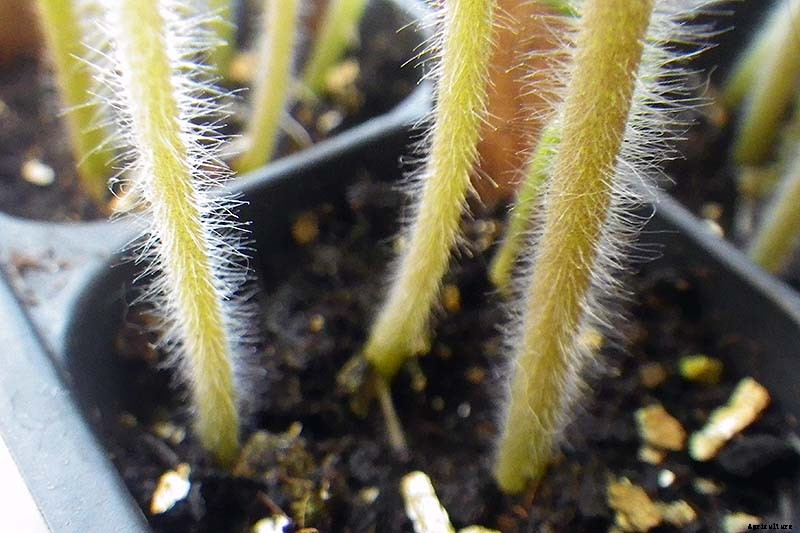
Tomatoes are one of the few plants that do well when their stems are buried deeply in the soil. This can introduce rot in other plants, but if you sink part of a tomato’s stem in the soil or bury it, the hairs on the stem will turn into adventitious roots.
Remove any lower leaves from the bottom two-thirds of the stem, and make sure the tomato still has at least two sets of leaves above the soil. And leave enough stem free so that there are at least a few inches between the soil and the leaves.
Add more soil until there is only a half an inch or so of head space at the top of the nursery pot, tap the pot gently to settle the soil, then water with your spray bottle or watering can.
If the root ball is still small and stringy, fill your nursery pot with soil and tap to settle the soil, until there is an inch or so of room left at the top.
Poke a hole into the middle of the soil with your finger.
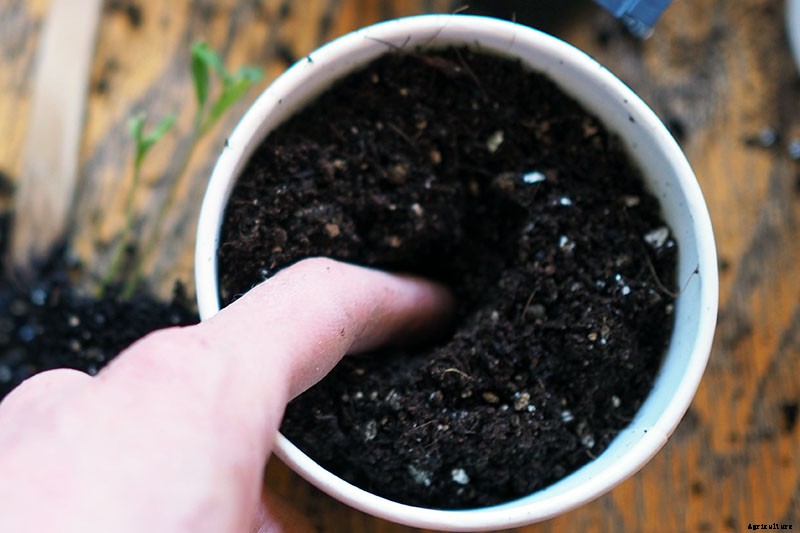
Place the young tomato into the hole, sinking it down as deeply as possible without bending the stem.
Add soil, filling the hole and the nursery pot. Gently tap the pot on your work surface to settle the soil, until there’s about 1/2 inch of room at the top of the pot.

Water your repotted tomato and return it to its germination station, place it next to a sunny southern window, or place it under your grow lights, keeping the light 2-3 inches away from the top of the plant.
As you approach your transplant date, continue with your daily care.
Harden Off
Your next step will be to give your tomatoes a transition period to adjust from their protected life in your home, estufa, or cold frame to their new location out in the elements.
Providing this transition period is called “hardening off.”
Tender transplants are vulnerable to outdoor weather conditions. Providing them with a gradual transition to the outdoors will help them become stronger and more resilient.
As Lois Miklas, Master Gardener Coordinator at Penn State Extension points out, a whole host of changes occur in young plants during this period:leaf surfaces thicken and strengthen, they become less prone to freezing, more food is stored in plant tissues, roots grow more quickly, and stem and leaf growth slows.
These changes make plants more resilient and able to withstand temperature changes, less frequent watering, and breakage from wind gusts.
During the hardening off period, gradually introduce your plants to the outdoors during the day for a few hours at a time, slowly increasing the amount of time they spend outside and the amount of direct sunlight and wind exposure they receive.
Here are some tips for hardening off your plants:
- Give your plants a 7 to 14-day transition period.
- Start the hardening off process in a shaded, sheltered location.
- Gradually increase sun exposure and time outside.
- Protect plants from wind for the first week.
- Water plants less frequently during the hardening off period, but do not let them dry out or wilt.
- Only begin hardening off when outdoor daytime temperatures are above 50°F.
- Don’t fertilize right before or during this period.
Hardening off your young plants may seem like a lot of work. But it’s work that will pay off with bountiful harvests of fresh, delicious summer tomatoes from vigorous plants.
6. Transplant to the Garden
When is it time to transplant your tomatoes to your garden or pots and containers ?
After hardening them off, and preferably 2 weeks after your last frost date.
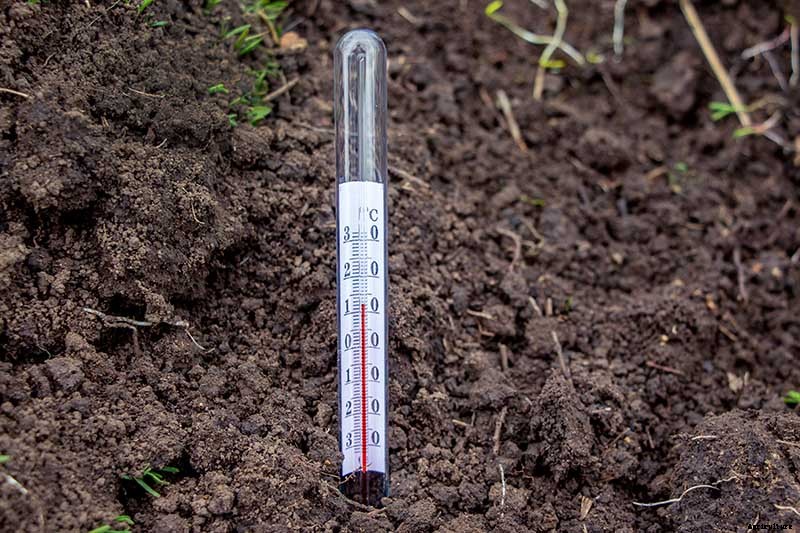
Tomatoes need soil temperatures of 60°F or higher for growth, so if your soil isn’t that warm yet, hold off on transplanting them until it is.
You can check your soil temperature with a soil thermometer. Keep in mind that this is not the same thing as the ambient air temperature.
When you’re ready to transplant, water your plants well before their big transition into outdoor soil.
Dig a hole a little larger than the pot from which you are transplanting, and add some worm castings ou composto para o solo.
If you used a biodegradable pot, don’t remove the transplant – the pot will go into the ground. Just make sure the rim of the biodegradable pot isn’t sticking up above the ground. Trim it before planting it so the top is level with the potting mix, the same way you did with your biodegradable seed starting trays.
If your tomato is in a plastic pot, squeeze the sides of the pot to loosen it, and tilt the plant sideways to slide it out. Try to avoid pulling the plant out by the stem, and only handle the soil if you can.
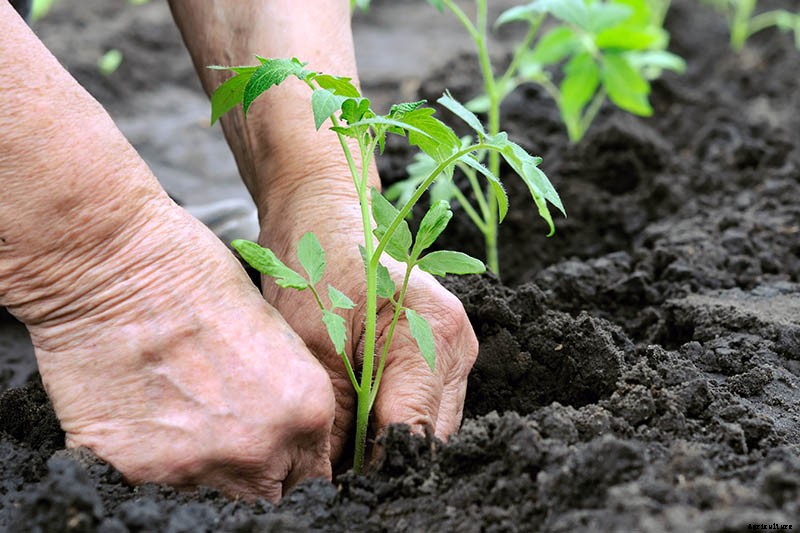
Plant your tomatoes at least as deep as their seed leaves. Planting more deeply is preferable, and will help your plants develop a strong root system.
If your plants are leggy – which they hopefully won’t be if you followed all of the above instructions, but sometimes it happens – you can lay them sideways in a trench in the soil rather than a hole, with just the top several inches of stem and a couple of sets of leaves remaining above ground.
Go ahead and stake your plants now, so you won’t disturb their roots later.
Keep your newly relocated plants well-watered for the first couple of weeks after transplanting.
For further guidance on transplanting your tomatoes into the garden , see our complete guide to growing these summer veggies.
Seed You Later, ‘Mater
Nice work, gardener! You are now ready to let your plants grow, and await boatloads of delicious homegrown tomatoes.
Have you started tomatoes from seed before? Do you have any other tips for success to share? Se então, I’d love to hear them, so tell me your thoughts in the comments.
Or if you have previously been unsuccessful at growing tomatoes from seed, perhaps this article helped you troubleshoot what went wrong. Let me know!
Looking for more tomato growing and harvesting information ? Be sure to check out some of our other guides next:
- 15 of the Best Canning Tomatoes You Should Grow
- The Ultimate Way to Support Tomato Plants:Florida Weave
- How to Grow and Care for Tomatoes in Your Garden
- How to Make Tomatoes Turn Red When They Refuse to Ripen on the Vine