Tudo sobre a cultura de cogumelos na Índia que você deve saber
O cultivo de cogumelos na Índia está crescendo passo a passo como uma fonte alternativa de lucros para muitas pessoas. No mundo todo, os EUA, China, A Itália e a Holanda são os maiores produtores de cogumelos. Na Índia, Uttar Pradesh é o principal produtor de cogumelos, seguido por Tripura e Kerala.
O que é cultivo de cogumelos?
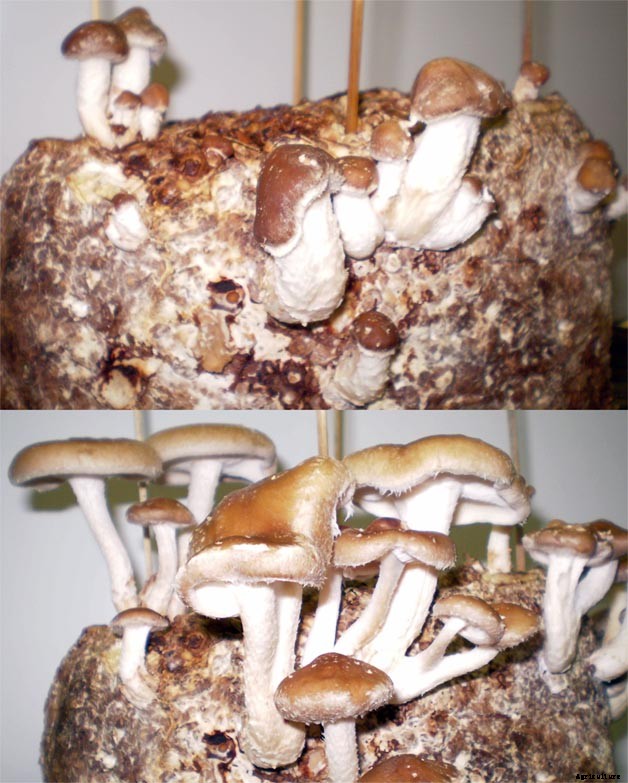
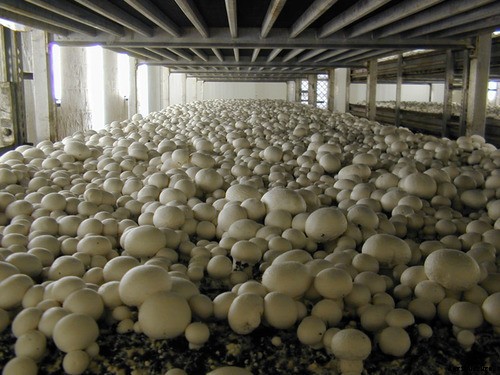
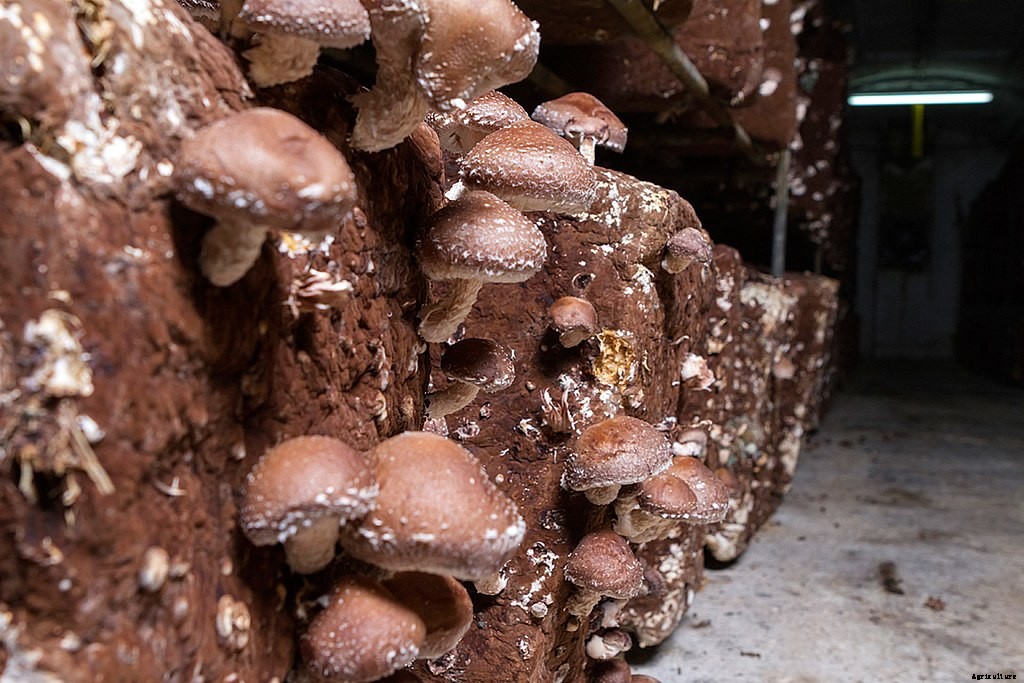
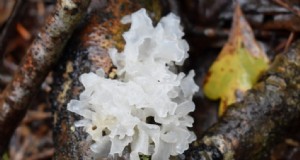
Os cogumelos são a estrutura frutífera de um fungo, simplesmente como as maçãs são os corpos frutíferos de uma macieira. Um cogumelo é uma espécie de fungo que tem o nome latino Agaricus bisporus. Cogumelos pertencentes a espécies de fungos são uma iguaria vegetariana nutritiva e uma boa fonte de proteína de alta qualidade (20-35 por cento do peso seco). Atualmente, são cultivadas 3 variedades de cogumelos, a saber, cogumelo branco (Agaricus bisporus), o cogumelo da palha do arroz (Volvariella volvacea) e o cogumelo da ostra (Pleurotus Sajor-Caju).
No reino vegetal, cogumelos são classificados com organismos heterotróficos (plantas inferiores). Ao contrário de alto, plantas verdes, esses heterotróficos não são capazes de fotossíntese. Os fungos são os necrófagos da natureza. No cultivo de cogumelos, resíduos de mercadorias consistindo em esterco de galinha, Estrume de cavalo, Palha, gesso e águas residuais (de seu próprio composto) são usados para fornecer o substrato altamente satisfatório a partir do qual os cogumelos crescerão. A amônia é eliminada do ar de processo por meio de um lavador de amônia antes de retornar à natureza. Até a amônia do ar é usada como fonte de nitrogênio na compostagem.
O fungo, também conhecido como micélio, aproveita o esterco como fonte de energia para sua combustão, energia libertadora que é usada para o crescimento. Os cogumelos contêm muitas vitaminas e minerais, como B- Complexo e ferro, e são uma boa fonte de proteínas de qualidade como a lisina. Os cogumelos são completamente livres de gordura (colesterol) e também ricos em antioxidantes.
Diferentes tipos de cultivo de cogumelos na Índia:
Existem três tipos de cogumelos que estão sendo cultivados na Índia, eles são cogumelos de botão, cogumelo de palha e cogumelo ostra. Os cogumelos de palha podem se desenvolver em temperaturas que variam de 35⁰ a 40⁰C. Os cogumelos botão crescem em algum momento do inverno. Os cogumelos ostra são cultivados nas planícies do norte. Todos os três cogumelos importantes para os negócios são cultivados com a ajuda de técnicas únicas. Eles são cultivados em canteiros extraordinários chamados canteiros de compostagem. Aprenda a domesticar cogumelos de cada tipo.
Etapas da cultura de cogumelos:
As seis etapas do cultivo de cogumelos são fornecidas da seguinte forma:
Etapa 1:Preparação do Composto
Para começar com essa ideia fabulosa de agricultura, precisamos nos aprofundar no conceito de “preparação de composto”.
Esta etapa inicial da preparação do composto é geralmente feita ao ar livre, embora uma estrutura fechada com uma sombra sobre ela possa ser usada. Aqui, uma laje de concreto, também conhecido como cais, é necessário para a compostagem. Mais, um revolvedor de compostagem para arejar e irrigar os ingredientes, e um carrinho para mover os ingredientes para o torneiro é necessário.
Antigamente, as estacas eram viradas à mão usando forcados, que ainda é uma alternativa às ferramentas e equipamentos mecânicos, mas é muito trabalhoso e fisicamente exigente para um trabalho como este.
Tudo é iniciado pela mistura e umedecimento dos ingredientes necessários à medida que são empilhados em uma pilha de formas retangulares com lados justos e um centro solto. Normalmente, os ingredientes a granel são colocados em um virador de composto. Depois que essa água é aspergida sobre o esterco de cavalo ou composto sintético, por exemplo, à medida que esses materiais passam pelo torneiro. Agora, os suplementos de nitrogênio e gesso (CaSO4. 2H2O) são espalhados por cima dos ingredientes a granel e são cuidadosamente e cuidadosamente misturados pelo torneiro. Uma vez que a pilha é embebida e formada, a fermentação (compostagem) começa como resultado do crescimento exponencial e reprodução de microorganismos, que é um processo natural nos ingredientes a granel.
Este composto para o cultivo de cogumelos desenvolve-se à medida que a natureza química dos ingredientes crus é convertida pela atividade de microorganismos, aquecer, e algumas reações químicas exotérmicas. Essas coisas resultam cumulativamente em uma fonte de alimento mais adequada para o crescimento do cogumelo e também inibe o desenvolvimento de outros fungos e bactérias. Deve haver umidade ideal, oxigênio, azoto, e carboidratos presentes em todo o processo, de outra forma, o processo pode parar. É por isso que a água e outros aditivos são adicionados cíclica e periodicamente, e a pilha de composto é agitada à medida que passa pelo virador.
Curiosamente, o gesso aqui é adicionado para minimizar a viscosidade que o composto normalmente tende a ter. O gesso aumenta a fluidez de certos produtos químicos no composto, e aderem à palha ou feno em vez de prejudicar a porosidade entre as palhas. Além disso, o benefício colateral desse fenômeno é que o ar pode permear a pilha confortavelmente, e o ar é essencial para o processo de compostagem. A exclusão do ar resulta em um ambiente anaeróbio no qual compostos químicos pútridos são formados, o que é extremamente prejudicial à cultura. O gesso é adicionado no início da compostagem a aproximadamente 18 kg por tonelada de ingredientes secos.
Ainda outro suplemento importante são os suplementos de nitrogênio, que em uso geral hoje incluem grãos de cerveja, farinhas de sementes de soja, amendoim, ou algodão, e esterco de galinha, etc. O único e único propósito desses suplementos é aumentar o teor de nitrogênio para 1,5% para esterco de cavalo ou 1,7% para material sintético, ambos calculados com base no peso seco. O composto sintético requer a adição de nitrato de amônio ou ureia no início da compostagem para fornecer à microflora do composto uma forma de nitrogênio prontamente disponível para sua reprodução e crescimento.
Mas às vezes as espigas de milho não estão disponíveis ou estão disponíveis a um preço considerado exorbitante. Substitutos para espigas de milho incluem casca de madeira ou serragem triturada, por exemplo, cascas de sementes de algodão, bagaço de uva neutralizado, cascas de grãos de cacau, e bagaço de uva neutralizado. O gerenciamento de uma pilha de composto contendo qualquer um desses materiais é único em termos de quais são os requisitos para a rega e o intervalo entre o reviramento da pilha.
No início, a pilha de composto deve ter 5 a 6 pés de largura, 5 a 6 pés de altura, e demorado por isso. Uma caixa de dois lados pode ser usada para formar a pilha (rick), embora alguns viradores sejam equipados com um "ricker", de forma que uma caixa não é necessária. Os lados da pilha devem ser firmes e densos, ainda assim, o centro deve permanecer solto durante a fase I da compostagem. À medida que a palha ou feno amolece durante a compostagem, os materiais tornam-se menos rígidos e o encolhimento pode ocorrer facilmente. Se os materiais se tornarem muito compactos, o ar não pode se esconder ao redor da pilha e um ambiente sem ar seria desenvolvido.
Este processo inicial de compostagem não dura mais do que algumas semanas, dependendo da natureza do material no início e suas características em cada ponto. Existe um forte cheiro de amônia associado à compostagem, que geralmente é complementado por um doce, cheiro de mofo. Quando as temperaturas do composto são de 68 graus centígrados e superiores, e a amônia está presente, ocorrem mudanças químicas que resultam em um alimento usado exclusivamente pelos cogumelos.
Como um subproduto das mudanças químicas, o calor é liberado e as temperaturas do composto aumentam. As temperaturas no composto podem chegar a 76 a 82 graus Celsius durante a segunda e terceira voltas, quando um nível desejável de atividades biológicas e químicas está acontecendo. No final da Fase um, o composto deve:1) ter uma cor castanho chocolate; 2) ter macio, canudos macios, 3) ter um teor de umidade de cerca de 68 a 74 por cento; e 4) têm um forte cheiro de amônia. Quando a umidade, temperatura, cor, e o odor descrito foi alcançado, Parabéns! Agora você concluiu a Etapa 1.
Espero que você tenha gostado da Fase I da criação de cogumelos!
Etapa 2:Terminando o Composto
Então, vamos encerrar o processo de compostagem por completo.
Agora que você terminou com a fase um de compostagem, we’ll be heading towards the second and extremely important step that is “Finishing the Compost”.
Então, here are two major reasons for Phase two or step 2 of composting. Pasteurization is necessary to kill any unwanted bacteria, insetos, nematóides, pragas, fungos, or other headaches that may be present in the compost. And secondly, it is necessary to remove the ammonia which formed during Phase I composting. Ammonia at the end of Step 2 in a concentration higher than 0.07 per cent is often dangerous to mushroom spawn growth, so it must be eliminated; Na média, a person can sense ammonia when the concentration reaches the threshold of 0.10 per cent.
Whether the compost is kept in beds, bandejas, or bulk, should be spread uniformly in-depth and compression or density. Compost density should allow for the gas to move around, this would make sure that ammonia and carbon dioxide would be replaced by the outside air.
Step 2 composting can be perceived as a regulated, temperature-dependent, ecological process using air to maintain the compost in a temperature range optimal for the de-ammonifying organisms to grow and reproduce. The growth of these thermophilic (heat-loving) organisms depends on the availability of usable carbohydrates and nitrogen, some of the nitrogen in the form of ammonia.
Optimum management for Phase II is difficult to pinpoint and most growers(commercial) tend toward one of the two systems in common use today:high temperature or low temperature. Due to the jargon nature of this process, it’s quite difficult to put the variables into exact numbers.
Por isso, you need to consult online, with someone who has experience in this field and it’s better if you find that person in your vicinity.
Step 3:Spawning
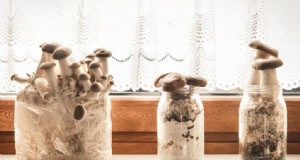
Mushroom spawning is similar to the seedling stage in agriculture and means keeping the spawn (mycelium) of mushrooms that can be purchased from a laboratory at nominal prices. After laying the spawns evenly on the tray and distributing it ergonomically, cover it with a thin layer of compost and keep it moist. Cover the tray with a wet sheet of paper and sprinkle water at regular intervals. The trays can be stacked on top of each other at a spacing of 15–20 cm. Keep the walls and floors wet to maintain a humidity-filled environment and temperature at 25 ° C.
Step 4:Casing
Be a bit vigilant about this one!
The casing is a covering applied to the spawn-run compost on which the mushrooms slowly and steadily form. The constituents are, field soil clay-loam, a mixture of peat moss with ground limestone, or reclaimed weathered, spent compost that could be utilised as the casing.
The Casing doesn’t require nutrients as the casing only acts as a water reservoir and a place where the formation of rhizomorphs takes place. The Rhizomorphs look like thick strings and form when the very fine mycelium fuses.
Casing must be pasteurized to eliminate any insects and pathogens which it might be carrying. It’s also quite important that the uniformity of the layers remains intact. This allows the spawn to move into and through the casing at the same pace and, em última análise, mushroom growth happens tauta chromatically. The casing should be able to retain moisture since moisture is essential for the development of a healthy mushroom.
The crop management after casing requires that the compost temperature be kept at around 24° C for up to 5 days after casing, and the relative humidity should be high. Depois disso, the compost temperature should be lowered to about -16.5°C each day until small mushroom initials have formed. Throughout the period following casing, water must be applied periodically to raise the moisture level to field capacity before the mushroom pins form. Knowing when, how, and how much water to apply to casing is an “art form” which is the subtle difference that acts as a trench between experienced growers from beginners.
Step 5:Pinning
The Mushroom instigates as and when rhizomorphs have started growing in the casing. The initials are minuscule but can be seen protruding on a rhizomorph. Once an initial grow four folds in size, the structure is a pin. Pins continue to grow larger through the button stage, and ultimately a button enlarges to a mushroom. The harvestable crop appears after around three weeks or maybe a few days here and there. Pins develop when the carbon dioxide content of room air is lowered to 0.08 per cent or lower, depending on the skill set of the grower, by introducing clean and fresh air into the growing room. Outside air has a CO² content of about 0.04 %.
If the CO² is lowered too early by airing too soon, the mycelium ceases to grow through the casing and mushroom initials plunge to the surface of the casing. As such mushrooms continue to thrive, they push through the casing and are tedious at harvest time. Too little wetness can also result in mushrooms forming below the surface of the casing. Pinning affects both the potential yield and quality of a crop and is a stepping stone in the production cycle.
Step 6:Cropping
It’s the final but a step of utmost importance. The value you’ll be generating out of this business always goes hand in hand with the ingenuity you’re putting in the cropping process.
It varies from person to person and depends upon the given below factors:
Production Capacity
Ambient Conditions
Investimento
Cropping Pattern
These were some of the variables you have to take care of if you want good returns. This comes in naturally as you get more and more experienced in the trade.
Disease and pest controlling measures in Mushroom Farming:
Mushroom flies:
These flies are small, delicado, Preto, yellowish or sometimes brown with different types of wing venation and size.
Management:
Spring is inside the wall of the mushroom house.
The insecticide should be added in the last turning of the compost.
Ácaros:
They are small in size and are Majorly white, amarelo, red and brown.
They can be found running over the surface of the fruit bodies, mushroom beds and on the floors and walls of the mushroom houses.
They damage the crop by feeding on the spawn to make holes in the mushroom caps and stalks and cause stunting of fruit bodies as well as brown spots on the caps and stems.
Management:
Proper pasteurization of compost.
Proper hygiene and sanitation.
Disinfection of the mushroom houses by spraying 0.1% dicofol.
Burning sulphur in the empty room.
Springtails:
They are silver-grey 2 brown colours with a light violet band along the sides of the body and black cellular fields present on the head.
They are the main species that damage mushrooms.
They enter mushroom houses along with organic matter.
They feed on mycelium from spawn.
They also feed on the gills of the oyster mushroom destroying the lining and spit out the mycelial strands at the base of the stripes.
They also attack the fruiting bodies of button mushrooms and cause slight pitting and browning at feeding sites.
Management:
Cleaning surrounding and inside of the mushroom house.
Proper disposal of spent compost.
Proper pasteurization of composed and casing material.
Raising the crop above the floor level.
Doenças:
Fungal diseases dry bubble:Verticillium fungicola
They are Muddy brown, often sunken spots on the cap of the mushrooms.
Greyish white mouldy
growth was seen on the pileus.
In a later stage, the mushroom
becomes dry and leathery.
Management:
Use clean equipment.
Control flies and mites.
Sanitary condition in growth house.
Bubbles can be destroyed with salt.
Infected mushrooms should be destroyed to prevent the spread.
Wet bubble:
Mycogen perniciosa:
Malformed mushrooms with swollen stipes.
Reduced or deformed caps.
Undifferentiated tissue becomes necrotic and a wet, soft rot emits a bad odour.
An amber liquid appears on infected mushrooms.
Mushrooms become brown.
Bubbles may be as large as a grapefruit.
It is also a parasite of wild mushrooms.
It produces two spore types, one which is small and water-dispersed like Verticillium. the second which is a large resting spore capable of persisting for a long time in the environment.
Management:
Hygiene and sanitation in a growth house.
Clean surrounding.
Benomyl at the rate of 0.95 g/m².
Carbendazim and Thiabendazole at the rate of 0.62 g/m².
Bacterial diseases:
Bacterial spot / brown blotch:Pseudomonas tolaasii
Pale yellow spots on the surface of the piles later turn yellow.
Em casos graves, mushrooms are radially streaked.
Damage at storage and transit.
High humidity and watery conditions are favourable for disease.
Vector:Tyroglyphus mite.
Lesions on tissue that are pale yellow initially later become a golden yellow or rich chocolate brown.
The discolouration is superficial (not more than 2 to 3mm).
Management:
Hygiene and sanitation.
Low humidity.
Watering with an A1 50 ppm chlorine solution.
Viral diseases:
Virus (several)
Double-stranded RNA
Reduced cropping,
Bare patches on the beds,
Long-bent stalks with small caps,
Premature opening of mushrooms,
Stalks tapering towards the base of the stalk.
Management:
Farm hygiene.
Clean trays to prevent infection from old infected mycelia.
Maintaining 60°C temperature throughout the compost.
Advantages of Mushroom Farming:
Use of ideal structure
Environment friendly
Use agriculture waste as substrate
Possible production all the year-round
Uses less capital
Income and employment generator
Mushrooms are rich in digestible essentials amino acids, rich protein, vitamins and minerals but low volume of high-quality unsaturated fat and water-soluble carbohydrates.
Have high medicinal properties.
It constitutes one of the most promising resources for promoting rapid socio-economic development.
Disadvantages of Mushroom Farming:
Lack of availability of quality spawn.
Mushroom spores can enter your lungs and cause serious health complications.
Mushrooms have an extremely strong smell and it worsens over time.
Need to constantly regulate the temperature.
Lack of proper training.
The chances of contamination are high in the Farming of Mushroom.
Conclusão:
The world mushroom industry has accelerated very rapidly in the last two decades by way of consisting of new types of mushrooms for commercial farming. Contudo, mushroom as a vegetable has not located an ordinary area amongst Indian consumers. Despite a favourable agro-climate, an abundance of agricultural wastes, noticeably low-cost labour and wealthy fungal biodiversity, India has seen a lukewarm response in its growth. Atualmente, the whole mushroom manufacturing industry in India is around 0.13 million tonnes.
From 2010-2017, the mushroom industry in India has recorded a common increase charge of 4.3% per year. Of the total mushrooms produced, white button mushroom bills for 73%, observed through oyster mushroom (16%), paddy straw mushroom (7%) and milky mushroom (3%). Compared to other vegetables; The per capita consumption of mushrooms in India is low and information shows that it is much less than 100 grams per year.
In the 12 months 2016-2017, the Indian mushroom enterprise generated an income of Rs. 7282.26 lakhs by exporting 1054 quintals of white button mushroom in canned and frozen form. Considering the production figures, the demand for spawn in India is estimated to be around 8000-10000 tonnes per year. The majority of this business spawn is furnished to non-public producers and the contribution of public region corporations in spawn grants used to be constrained to only 10%. Neste artigo, we attempted to analyse the contemporary state of affairs of the mushroom industry with the assistance of AICRP community centres placed throughout the US and discuss the possibilities and challenges for the improvement of mushroom entrepreneurship in India.