Vaccinium spp.
Os mirtilos são populares entre os jardineiros domésticos porque, vamos encarar, eles são deliciosos. Mas embora as bagas recebam a maior parte da atenção, os arbustos são lindas plantas por direito próprio.
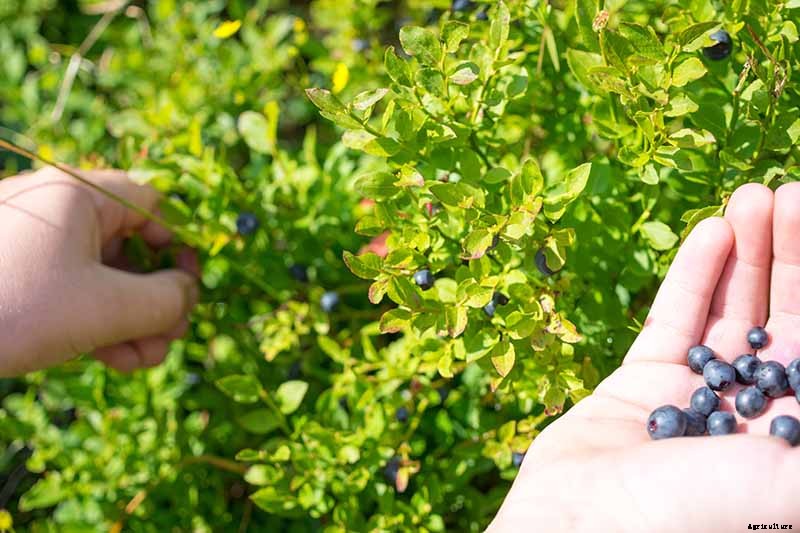
As plantas de mirtilo florescem durante o meio ao final da primavera - normalmente em maio ou junho, dependendo da espécie e cultivar - com branco vistoso, cor de rosa, ou flores roxas.
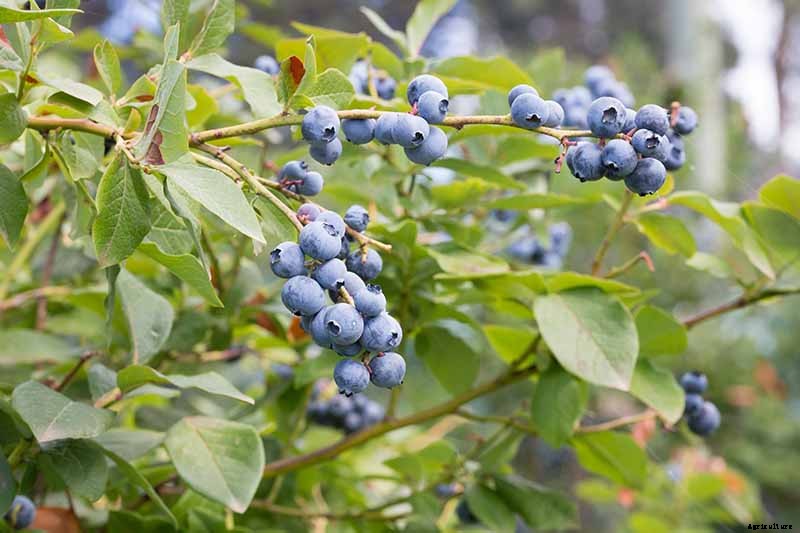
À medida que as flores dão lugar a frutos no verão, normalmente julho e agosto, as folhas verdes escuras com a parte inferior clara proporcionam contraste com os frutos de amadurecimento claros a azuis escuros.
No outono, a folhagem fica vermelha, laranja, roxa, amarelo, ou uma mistura dessas cores.

Existem cinco tipos comuns de plantas de mirtilo, começando com o mais popular no cultivo comercial, a highbush do norte ( Vaccinium corymbosum ) .
Em seguida, temos o highbush do sul, que é um híbrido de V. corymbosum e uma espécie nativa da Flórida conhecida como mirtilo perene, V. darrowii .
Então há o espécies lowbush ( V. angustifolium ) , que cresce baixo no chão, ficando abaixo de 60 centímetros de altura. É nativo dos Estados Unidos e do Canadá e o tipo que as pessoas costumam buscar na natureza.
E há também a espécie rabbiteye, V. virgatum . Eles crescem nativos em todo o sul dos Estados Unidos e podem atingir até 6 metros de altura.
Finalmente, existe a meia altura, que é um híbrido de mirtilos lowbush e highbush.
Cultivares de cada espécie foram cultivados para produzir frutos que amadurecem em épocas diferentes - cedo, meia temporada, ou tarde.
Há muitas informações interessantes e úteis sobre o cultivo de mirtilos para cobrir, então vamos começar! Aqui está o que veremos nas próximas seções:
O que você aprenderá
- O que diferencia os diferentes tipos comuns de mirtilo?
- Cultivo e História
- Propagação
- Como crescer
- Dicas de crescimento
- Poda e manutenção
- Cultivares para selecionar
- Gerenciando pragas e doenças
- Colheita
- Preservando
- Receitas e ideias culinárias
- Guia de crescimento de referência rápida
O que diferencia os diferentes tipos comuns de mirtilo?
Mirtilos highbush ( V. corymbosum ) são arbustos lenhosos decíduos que podem atingir até 2,5 metros de altura na maturidade.
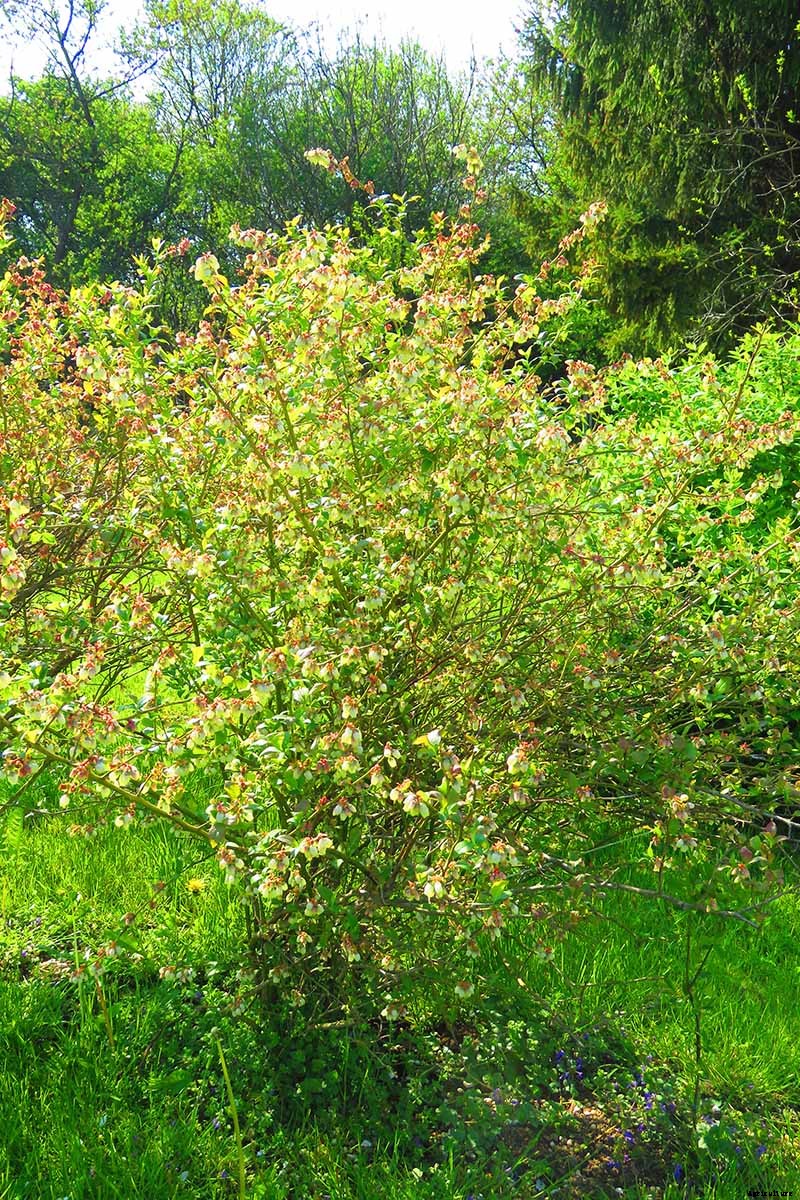
Em contraste, como você pode esperar de seu nome, bagas lowbush ( V. angustifolium ) são arbustos lenhosos decíduos significativamente mais curtos.
Às vezes chamados de mirtilos selvagens, estes só alcançam alturas de cerca de dois metros de altura.
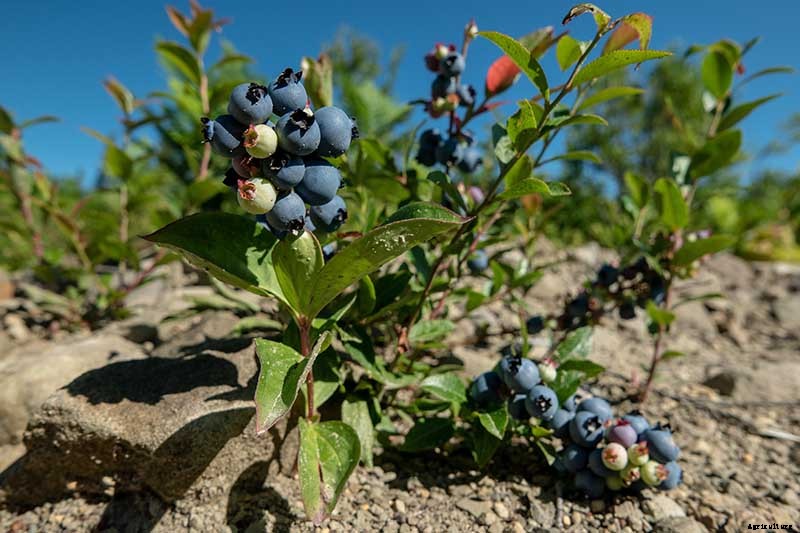
Além do tamanho, outra maneira pela qual os tipos disponíveis diferem diz respeito à região de jardinagem. Algumas plantas highbush e rabbiteye podem crescer em climas mais quentes, enquanto as variedades lowbush podem tolerar climas mais frios. Mirtilos meio altos ficam em algum lugar no meio.
Tipos highbush crescem melhor em Zonas de robustez do USDA 4-8, enquanto os tipos lowbush crescem confortavelmente nas Zonas 2-7. Arbustos meio altos crescem melhor nas Zonas 3-7. É possível, Contudo, para encontrar cultivares específicos que podem crescer fora dessas faixas.
Por que a diferença? Não é só que as plantas altas não conseguem lidar com longos períodos de temperaturas congelantes, mas como eles são tão altos, caules podem quebrar e podem ser esmagados sob a neve pesada. Plantas Lowbush, por outro lado, não se importe com uma espessa manta de neve.
Essas espécies são subdivididas em variedades do norte e do sul, com faixas mais estreitas de clima adequado.
Por exemplo, mirtilos highbush e lowbush do norte precisam de cerca de 800-1, 000 horas de refrigeração, enquanto as plantas altas do sul precisam de cerca de 150-800 horas, dependendo da cultivar.
Arbustos meio altos, Como você pode esperar, precisa de algo no meio, geralmente em torno de 800 horas.
O que é isso, você pergunta?
“Horas frias” referem-se ao número de horas que as temperaturas precisam estar entre 32 ° e 45 ° F no inverno para que as plantas produzam flores e frutos na primavera e no verão seguintes.
Um pouco atípico, mirtilos rabbiteye ( V. virgatum ) se destacam porque amadurecem cerca de um mês depois do que os tipos lowbush ou highbush, e as bagas são menores e mais doces, com uma pele mais resistente.
As bagas imaturas são de cor branca cremosa ou rosa com um cálice vermelho ou rosa brilhante, dando à fruta a aparência de um olho de coelho albino.
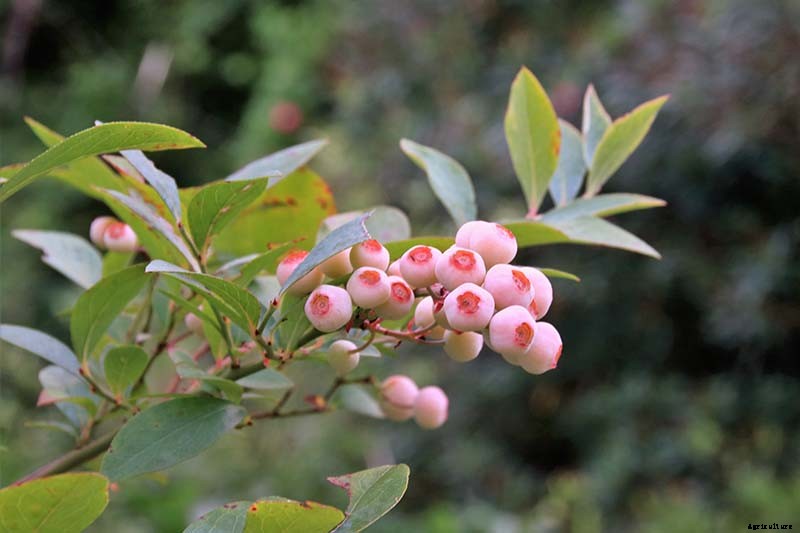
Os arbustos Rabbiteye podem crescer até 6 metros de altura e são um pouco mais tolerantes a condições de seca ou seca do que outros tipos. Eles não são capazes de tolerar muita água, como outros tipos de mirtilos podem.
Rabbiteyes crescem melhor nas Zonas 7-9 e precisam de 300-700 horas de resfriamento, dependendo da cultivar.
Cultivo e História
Bagas no Vaccinium gênero cresce selvagem em todo o mundo.
Por exemplo, no norte da Europa continental, Irlanda, as ilhas britânicas, Islândia, e norte da Ásia, você pode encontrar o mirtilo europeu nativo ( V. myrtillus ), também conhecido como mirtilo da floresta ou mirtilo.
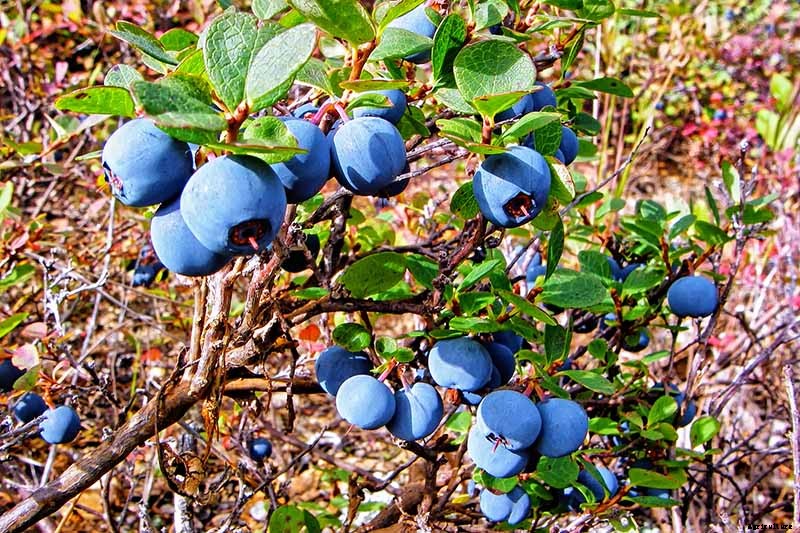
Na América do Sul, você pode encontrar o mortiño ( V. floribundum ) e o mirtilo jamaicano ( V. meridionale )
Mas quando falamos sobre os mirtilos que você provavelmente encontrará na loja, geralmente estamos falando sobre as plantas nativas da América do Norte.
Originalmente, todos os mirtilos que crescem na América do Norte eram plantas lowbush ou rabbiteye não cultivadas, junto com algumas outras espécies como V. alaskaense , ou o mirtilo do Alasca, e V. ovalifolium , ou o mirtilo de folha oval).
Os cientistas acreditam que o mirtilo foi uma das primeiras plantas frutíferas no continente a ser utilizada pelos humanos após a última era glacial.
Foi graças às populações indígenas que viviam no que ficou conhecido como Estados Unidos que os colonizadores europeus aprenderam sobre esta fruta magnífica.
Os nativos americanos comiam as frutas frescas quando estavam na estação, cozinhou-os em ensopados e carnes, cozido com eles, e os secou para serem comidos durante o inverno. Eles também os usavam medicinalmente.
As pessoas continuaram a colher, comer, e preservar mirtilos silvestres exclusivamente, até que Elizabeth Coleman White e Frederick V. Coville apareceram.
White trabalhou na fazenda de cranberry de seus pais no final de 1800. No momento, os produtores não achavam que o mirtilo selvagem poderia ser cultivado, mas White acreditava que ela poderia fazer isso acontecer.
Ela estendeu a mão para Coville, um botânico do USDA que também estudava mirtilos silvestres, e os dois trabalharam juntos para criar o primeiro mirtilo highbush domesticado.
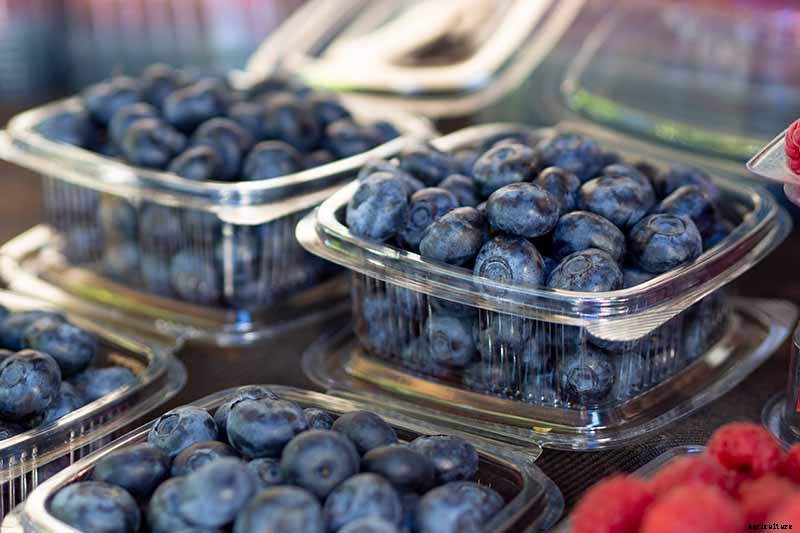
Nos dias de hoje, Os highbush do norte são o mirtilo cultivado comercialmente mais comum na América do Norte e as frutas que você vê no supermercado nas conchas de plástico ou nas cestas de frutas são geralmente do tipo highbush.
O arbusto alto do sul só é cultivado há cerca de seis décadas. É um híbrido das variedades highbush e rabbiteye do norte ou perenes.
Mas isso não significa que o mirtilo lowbush não esteja mais por perto. É uma cultura importante no nordeste dos Estados Unidos e Canadá, onde é cultivado ou colhido em povoamentos silvestres manejados.
Essas frutas são geralmente vendidas enlatadas ou congeladas porque não armazenam ou despacham bem, embora você possa encontrá-los frescos localmente durante a estação de cultivo.
Rabbiteyes são cultivados comercialmente no sudeste dos Estados Unidos, e se você tiver a sorte de morar na região, você pode encontrar frutas frescas em mercados e supermercados durante o verão.
Enquanto as espécies de mirtilo da América do Norte são cultivadas em todo o mundo, da Austrália à Sibéria, a maioria das bagas cultivadas comercialmente vendidas em todo o mundo vem dos Estados Unidos.
Propagação
Você tem muitas opções quando se trata de propagar suas plantas.
Raízes nuas, estacas, e os transplantes são mais fáceis, mas se você quiser uma aventura crescente, você também pode cultivá-los começando com sementes.
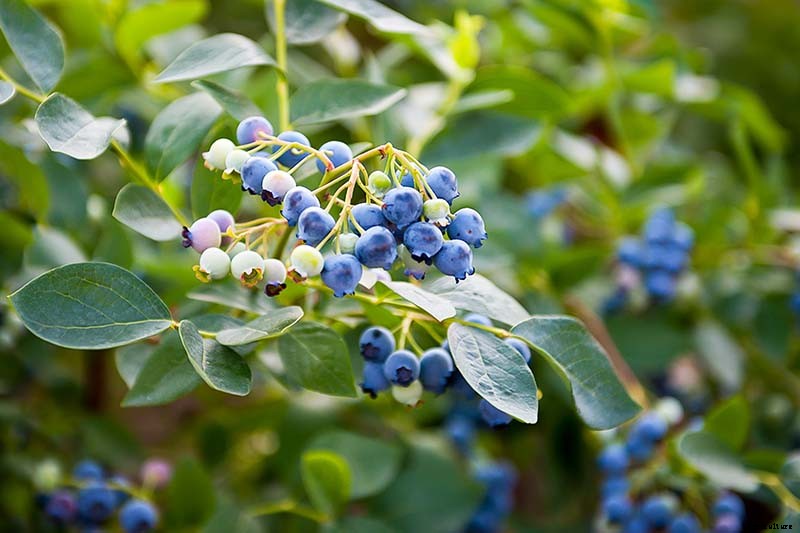
Seja qual for o método que você escolher, certifique-se de preparar bem o solo antes de furar as novas plantas no solo. Se você precisar alterar muito seu solo, pode ser um processo demorado.
Por exemplo, se você tem solo argiloso ou arenoso, trabalhar em alguns pinheiros compostados ou serragem de abeto repetidamente durante vários meses pode ajudar a criar as condições certas para os mirtilos.
Da Semente
Começando com a opção mais desafiadora, você pode cultivar mirtilos a partir de sementes, mas obviamente levará mais tempo para produzir sua primeira colheita do que se você começasse com plantas estabelecidas.
As sementes podem ser compradas ou você pode extraí-las dos frutos. Lembre-se de que as sementes de plantas híbridas não se tornarão verdadeiras para os pais.
Para extrair sementes, Coloque uma xícara de mirtilos no liquidificador com quatro xícaras de água. Execute-o em alta por 15 segundos e, em seguida, deixe a mistura descansar por 10 minutos.
Eventualmente, a polpa vai subir para o topo e as sementes irão afundar.
Despeje a polpa, adicione mais água para repor o que derramou, e reserve por mais cinco minutos. Repita até obter água limpa com sementes de mirtilo no fundo.
Alguns meses antes da última data de geada em sua área, polvilhe suas sementes sobre um recipiente cheio de umedecido musgo de turfa .
Coloque uma camada fina de turfa por cima para cobrir. Cubra a bandeja com um pedaço de plástico ou uma cúpula de umidade para manter a umidade. Mantenha as sementes em torno de 60-70 ° F.
Agora vem o jogo da espera. Cada vez que faço isso, tenho certeza de que minhas sementes são fracassadas e estou pronto para jogar tudo fora, apenas para ver as pequenas mudas verdes espetarem suas cabeças para fora da turfa.
Isso porque pode demorar um ou dois meses - ou às vezes três! - para as sementes germinarem. E estou impaciente.
Uma vez que as mudas têm cerca de sete centímetros de altura, remova-os da turfa e coloque cada um em uma panela de 15 centímetros cheia de partes iguais de turfa, areia, e solo para envasamento.
Mantenha o meio úmido, mas não molhado, e colocar as mudas em um local onde recebam cerca de seis horas de sol por dia.
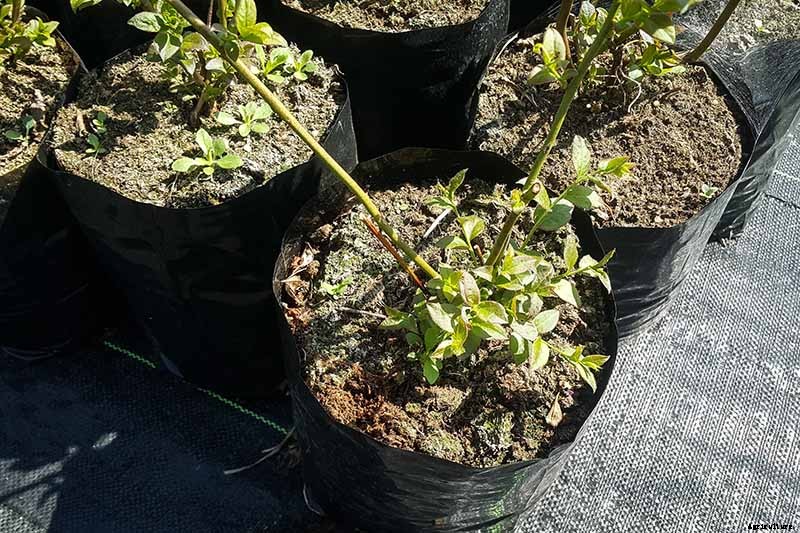
Assim que o perigo de geada passar, você pode colocar as plantas no solo lá fora, mas certifique-se de endurecê-los por uma semana antes de transplantá-los para seu lar permanente.
Endureça as mudas colocando-as do lado de fora em um local protegido com luz indireta por uma hora, e traga-o de volta para dentro. Repita isso, adicionando uma hora por dia durante uma semana, até que possam passar o dia inteiro fora.
Como as sementes precisam de condições cuidadosamente controladas, a semeadura direta no jardim não é recomendada.
Por Estacas
Se você tiver acesso a um mais antigo, arbusto de mirtilo saudável, você pode tirar estacas de madeira para iniciar novas plantas.
No final do inverno, quando a planta ainda está dormente, pegue um corte de seis polegadas de madeira com um ano de idade. Você quer um corte da espessura de um lápis.
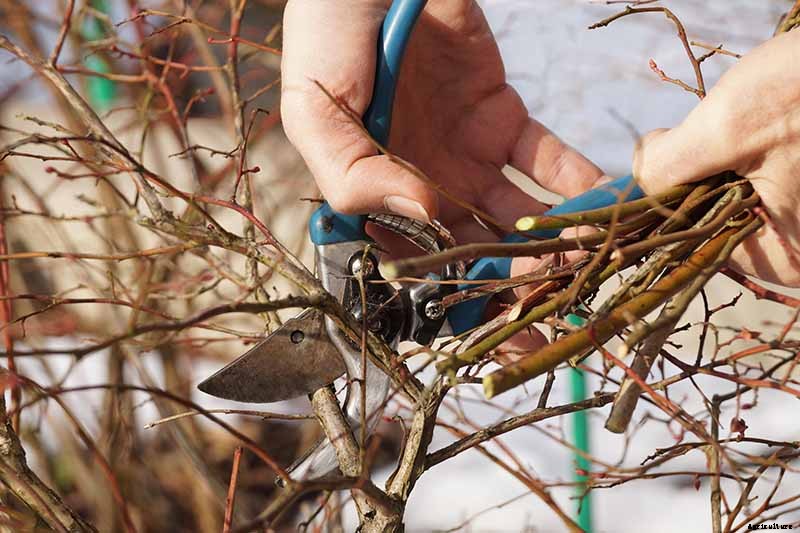
Corte a extremidade que você vai enterrar em um ângulo para ajudar a afundá-la no solo e para aumentar a área de superfície para a absorção de água e nutrientes.
Enterre o corte com cinco centímetros de profundidade em um recipiente cheio de partes iguais de areia, musgo de turfa, e solo para envasamento.
Eu gosto de usar contêineres de quatro ou seis polegadas, de preferência um tipo compostável como CowPots.
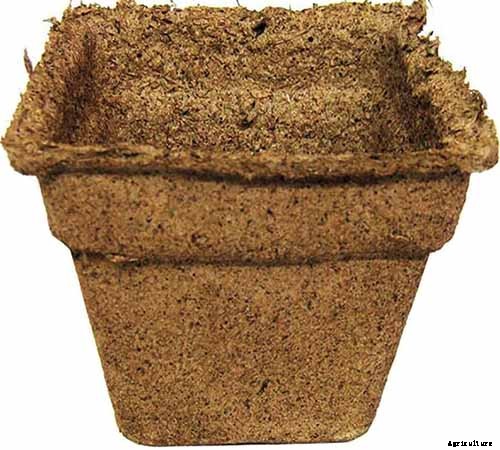
CowPots Vasos biodegradáveis
Arbico Organics vende esses potes úteis em embalagens de 12, 180, ou 450 - para os jardineiros sérios!
Mantenha o substrato úmido, mas não molhado. Em cerca de três meses, seu corte deve desenvolver raízes. Você saberá que esse é o caso se der um puxão suave no corte e ele resistir.
Assim que o risco de geada passar, endureça a estaca enraizada conforme descrito acima, e, em seguida, plante-o em seu local permanente.
Cave um buraco com o dobro da largura e da profundidade do recipiente em que a muda estava crescendo. Coloque a planta no buraco, espalhando as raízes. Aterro com terra e serragem de pinheiro ou abeto, se estiver usando.
As estacas enraizadas levarão cerca de dois ou três anos a mais do que os transplantes para produzir frutos.
Por raiz nua
As raízes nuas são geralmente mais acessíveis do que os transplantes, mas eles requerem um pouco de preparação extra para se propagarem.
Se você não puder plantar os seus imediatamente após a chegada do seu pedido ou se você os trouxer do berçário para casa, coloque-os em um refrigerador, Sítio escuro. Você não quer deixar as raízes secarem, então borrife-os diariamente com uma garrafa de água.
Quando você estiver pronto para plantar, mergulhe as raízes em água à temperatura ambiente por três a seis horas. Retire da água e corte todas as raízes quebradas.
Então, espalhe as raízes horizontalmente em vez de para baixo e cave um buraco alguns centímetros mais largo e da mesma profundidade que as raízes.
Esses arbustos preferem ter suas raízes próximas à superfície do solo, em vez de profundamente, então, estamos tentando recriar seu hábito natural de crescimento quando fazemos isso.
Coloque no buraco e preencha com terra que você desenterrou. Regue bem para assentar o solo.
Leia mais sobre a propagação de mirtilo aqui .
Transplante
Se você está com pressa para cavar essas frutas doces, você pode comprar um, dois, ou transplantes de mirtilo de três anos.
A maioria das fábricas começa a produzir cerca de dois anos, então você pode cavar imediatamente, embora sua primeira colheita possa ser pequena.
Os transplantes devem ser plantados no outono ou primavera, dependendo de onde você mora. Jardineiros em regiões mais quentes, como o Pacífico Noroeste ou Sudeste, devem plantar plantas em outubro, Marchar, ou abril.
Em regiões mais frias como a Nova Inglaterra, a primavera é melhor para permitir que a planta se estabeleça antes que o inverno chegue.
Quando você estiver pronto para plantar, remova-o com cuidado de seu recipiente e certifique-se de soltar completamente a raiz. Espalhe as raízes, não para baixo.
Quando você acabar, o sistema radicular deve ter cerca de duas vezes mais largura e metade da profundidade de quando estava confinado ao vaso em que veio.
Cave um buraco um pouco mais largo do que a raiz recém-espalhada e com a mesma profundidade.
Você pode querer trabalhar um pouco de turfa ou composto no solo ao redor se a textura da sua terra for diferente do solo em que o transplante estava crescendo. Isso ajuda a melhorar a aeração e estimula a expansão das raízes.
Por exemplo, se o seu mirtilo em vaso estiver em uma mistura argilosa para vasos, mas seu solo nativo é bastante arenoso, você precisará corrigir seu solo para encorajar as raízes a se estenderem em seu solo nativo.
Você pode aprender mais sobre como transplantar mirtilos em nosso guia.
Como crescer
Mirtilos são plantas ericáceas, junto com outros amantes do ácido, como rododendros, azaléias , e hortênsias . Todos eles gostam de condições de solo ácido semelhantes.
Você também pode cultivá-los perto de árvores que prosperam em solo ácido, como alguns pinheiros. Apenas lembra-te, existe um mito comum no jardim de que as agulhas de pinheiro tornam o solo ácido.
Isso não é verdade. Não presuma que você pode plantar seus mirtilos perto de um pinheiro e que o solo terá o pH correto.
Plantas de mirtilo precisam de solo ácido com um pH entre 4,0 e 6,0, dependendo da espécie. Todos os mirtilos precisam de solo poroso, com muita matéria orgânica. Mas eles não precisam de uma tonelada de nutrientes adicionais.
Teste seu solo um ano antes do plantio, então você terá tempo de fazer alterações para ajustar o pH - se necessário - antes de colocar seus novos mirtilos no solo.
Tenha em mente, Contudo, que mirtilos rabbiteye não se dão bem em solo que não tem naturalmente um pH igual ou inferior a 5,5.
Se o seu solo tem um nível de pH mais alto do que este, qualquer construir uma cama elevada e encha-o com solo ácido, ou planta em algum lugar que tenha o pH ideal, em vez de usar um corretivo de solo como enxofre para alterar o pH.
Essas plantas precisam de um equilíbrio uniforme de nitrogênio, potássio, e fósforo. Isso significa que se seu solo é deficiente em um desses nutrientes, você precisará adicioná-lo.
Por exemplo, se sua terra é pobre em nitrogênio, você vai querer trabalhar em algo como farinha de sangue para adicionar nitrogênio.
Eu amo este produto da Terra, que você pode comprar pela metade, cinco, 20, ou pacotes de 50 libras na Arbico Organics .

Refeição de sangue na terra
Depois de conduzir seu teste de solo, corrigir com qualquer fertilizante necessário antes de plantar seus novos arbustos, e deixe os grânulos se dissolverem por uma ou duas semanas. Os grânulos de fertilizantes que tocam as raízes jovens diretamente podem queimá-las.
Se o seu solo não for naturalmente argiloso, trabalhar em algum abeto envelhecido ou serragem de pinheiro, ou casca finamente picada, para melhorar a aeração.
Você pode diminuir o pH adicionando enxofre elementar granulado ou peletizado ou musgo de turfa ao solo, seguindo as recomendações do fabricante. O enxofre leva cerca de um ano para alterar o pH do solo.
Alternativamente, você também pode usar sulfato de alumínio, ou sulfato de ferro. Estes funcionam mais rápido, mas você precisa ter cuidado para não adicionar muito. É fácil exagerar com sulfatos.
Enquanto você testa e melhora seu solo antes de plantar, você também deve remover todas as ervas daninhas da área. Plantas de mirtilo não gostam de competir por nutrientes, sol, ou umidade.
Isso é porque eles têm sistemas de raiz superficiais, sem grandes raízes de torneira para cavar fundo no solo em busca de água e comida.
Você também pode plantar uma cultura de cobertura para ajudar a melhorar o solo e combater as ervas daninhas. Centeio, trigo sarraceno, ou sudangrass ( Sorgo x Drummondii ) todos funcionam bem para esse fim.
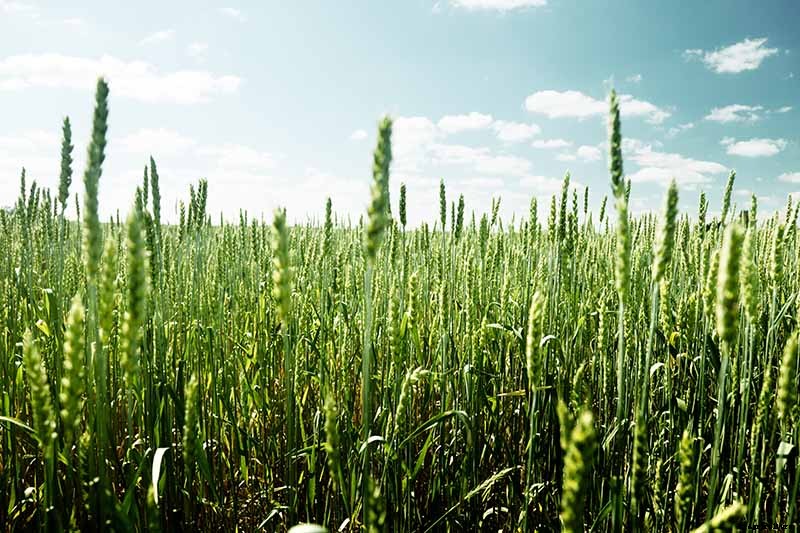
Considere usar camas levantadas se você precisar alterar seu solo para se adequar aos mirtilos. Se o solo carece de nutrientes ou precisa de ajuste de pH, ou se você tem pesado, solo compactado ou argiloso, você pode querer construir alguns canteiros elevados para plantar.
Isso dá a você a capacidade de alterar o solo sem impactar a área circundante.
Você pode construir uma caixa de madeira, ou simplesmente suba um pouco de solo melhorado, se preferir. Se você tem solo pesado, você também pode trabalhar em um pouco de areia para melhorar a drenagem.
Você deve agrupar mirtilos, em vez de espalhá-los pelo jardim. Isso torna mais fácil manter o pH do solo no nível certo, que é a chave para uma colheita abundante. Também ajuda as plantas a polinizarem umas às outras.
Nem todos os mirtilos precisam de um companheiro para a polinização, mas muitos fazem. Isso significa que você precisa plantar cultivares que floresçam ao mesmo tempo.
Os arbustos altos do sul precisam ser plantados com uma cultivar que floresça ao mesmo tempo, e isso será normalmente observado na descrição da planta ou na etiqueta de crescimento do viveiro.
Os mirtilos Rabbiteye também precisam de um companheiro para a polinização. Novamente, certifique-se de escolher cultivares que floresçam em épocas semelhantes.
‘Alapaha, '' Clímax, ’ ‘Premier, ’ ‘Prince, ’ ‘Savory, ’ and ‘Vernon’ are all early bloomers.
‘Austin, ’ ‘Brightwell, ’ ‘Columbus, ’ ‘Montgomery, ’ ‘Powderblue, ’ and ‘Tifblue’ all bloom mid-season.
‘DeSoto, ’ ‘Ochlockonee, ’ and ‘Onslow’ are late bloomers.
Most highbush cultivars are self-fertile, but cross-pollination will typically give you a larger harvest and bigger berries.
While harvest dates can vary dramatically among different cultivars, most northern highbush plants bloom within a week or so of each other. Por essa razão, all cultivars can be used for cross-pollination.
Native bees, bumblebees, and honeybees are the only pollinators of blueberries. The flowers can’t be pollinated by birds or butterflies because they require “buzz pollination.” This happens when a bee vibrates or shakes the pollen loose from a flower.
Large highbush species should be spaced around four to six feet apart, and dwarf cultivars about two to four feet apart.
Rabbiteye bushes need more space, with at least six feet between plants, but preferably more. Lowbush blueberries can be planted one to two feet apart.
Most blueberries like a lot of moisture, and those that are growing in the wild can often be found near water, or in swampy or boggy areas.
Contudo, rabbiteye blueberries are more drought tolerant and will suffer if given too much water.
To complicate things, blueberries have very shallow roots. That means they dry out easily, so they need consistent watering.
Plants require one to two inches of water a week, depending on the species. Você pode use a rain gauge to help determine how much precipitation you receive.
If you don’t get that much naturally, you’ll need to provide supplemental irrigation.
Mulches like aged pine needles, lascas de madeira, and bark are ideal for helping to retain moisture. Don’t use dyed or synthetic mulches because they may have a negative impact on the environment.
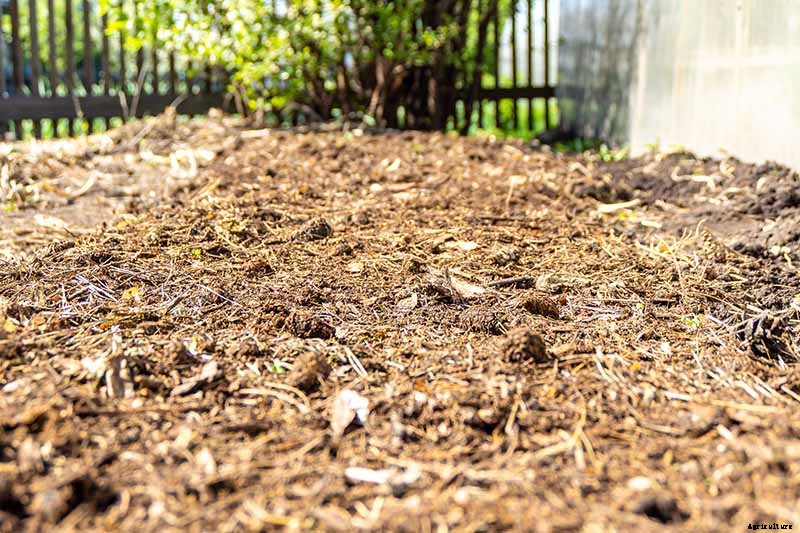
While it may be tempting, don’t use homemade compost around blueberries unless you’ve checked its pH first – it’s usually too alkaline for their liking. Manure-based composts are almost always too alkaline, so it is best to avoid them.
When it comes to fertilizing, wait until the plants have been in the ground for about six months before you apply any food.
Então, apply a tablespoon fertilizer formulated for acid-loving plants every six weeks, extending the fertilizer out 12 inches in a circle around the plant.
Arbico Organics carries Down To Earth’s Acid Mix, which is perfect for blueberries. It comes in one or five-pound boxes – or pallets of 25 or 50 pounds, if you’re planning on going big!

Down To Earth Acid Mix
No segundo ano, start fertilizing right as new growth emerges and again every six weeks. Apply two tablespoons of fertilizer per plant, extending 18 inches out from the center.
From the third year on, apply a cup of fertilizer per plant spread three feet around the perimeter.
Avoid using commercial fertilizers or using too much fertilizer at once on rabbiteye plants. They’re particularly sensitive.
Dicas de crescimento
- Plante em pleno sol.
- Maintain soil pH of 4.0-6.0.
- Provide 1-2 inches of water per week if rain doesn’t provide it.
Poda e manutenção
If you’re going to grow blueberries, you’ll need to become good friends with your pruning tools.
Regular pruning is effective for managing insects, it helps to prevent disease, and it encourages more abundant harvests and larger fruits. Mais, it makes it easier to harvest the fruits when they’re ready to pick.
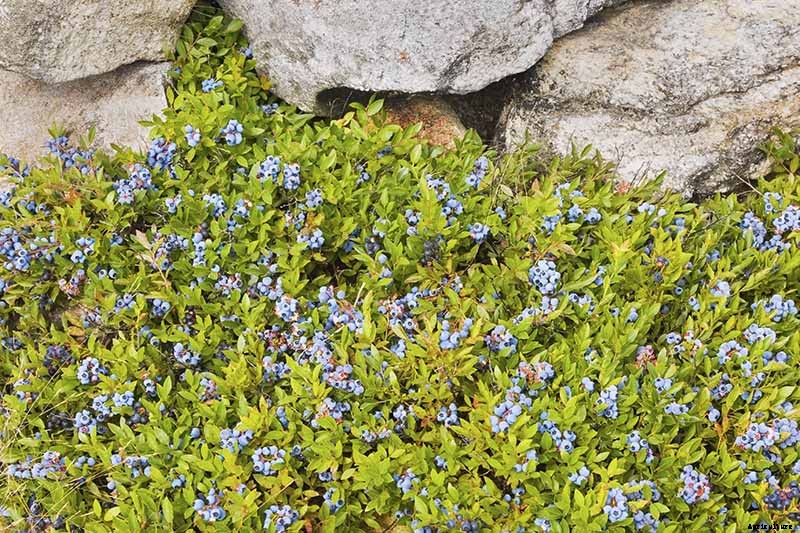
Older canes produce smaller fruit and less of it. They also compete with the younger, more productive canes for nutrition and light. Em outras palavras, they eventually need to go.
The best fruit forms on one-year-old canes and new shoots.
For the first two years of a plant’s life, you don’t need to do much work. Just remove the flower buds by snipping or rubbing them off.
You want the plants to focus on maturing and developing rather than producing berries, tempting though it may be to see your first harvest as soon as possible.
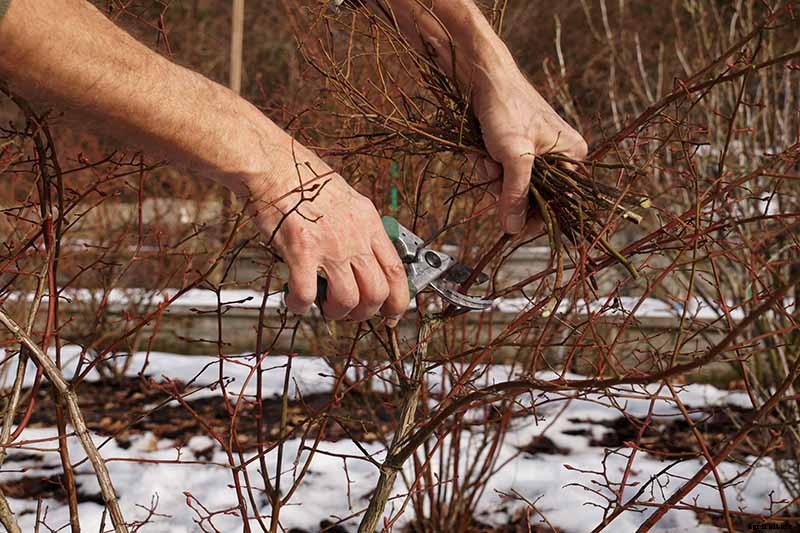
In the spring of the third year when the plant is still dormant, remove any canes that cross, any that are twisted, or any that are growing low along the ground.
Plants should fully emerge from dormancy by the end of March in most areas, and you want to complete your pruning prior to this.
Remove any older canes that weren’t productive in the previous season. Para fazer isso, just cut the canes down cleanly at the base of the plant using a clean pair of clippers or podadores .
Então, remove all but two or three of the largest, tallest, most robust new canes that were produced in the previous year. New canes are small, pliable, and often red or darker in color than older canes. You’ll repeat this every year.
Once the plant reaches its mature size, usually around eight years of age, it will typically have about 10 to 20 canes of various ages if you’ve kept up with your pruning.
Going forward, remove any diseased or damaged canes each spring. Então, remove any older canes that are larger than one inch in diameter.
They’ll likely be gray rather than brown or red, and the bark may be peeling. Don’t remove more than 20 percent of the old canes at a time.
If the plant looks crowded in the middle, thin out some canes to improve airflow. As you did in the first year, remove canes that are crossing and rubbing against each other each following year.
You should also remove any canes that don’t have healthy fruit buds e vegetative buds at the end simultaneously.
Blueberry canes can have both fruit buds, spots where the blossoms and fruits will emerge, and vegetative buds, spots where the leaves will emerge. Any cane that has nothing but vegetative buds or no buds at all should be removed.
How can you identify these? Fruit buds appear at the end of cane shoots. They look like teardrop-shaped, swollen buds that will form into clusters of flowers and fruit.
Lower down the canes from those are smaller, pointed buds. These grow new vegetative shoots in the following year.
Wear protective clothing while you are pruning. Luvas, glasses, and a long-sleeved jacket are all good ideas, because blueberry bushes can be rough.
If you have multiple lowbush blueberries, you can simply mow a few down to the ground each year with a lawn mower or weed wacker.
The plants that you mow down won’t produce the next year, so you want to make sure to leave two productive plants alone and alternate mowing. De outra forma, you can prune them as you would taller blueberries.
You may also want to trim the edges of the bushes to limit how far out they spread.
Feel free to give rabbiteye bushes a haircut in order to keep their height low enough that you can reach all those berries. Just don’t take more than a third of the height off at a time.
De outra forma, leave the plants tall and consider the higher berries a sacrifice to our avian friends. They’re nice to have around because they keep insects under control in the garden – we’ll get into a more detailed discussion of pests in a minute.
Blueberries of all species do best with a lot of mulch because it cools the soil and helps retain moisture.
Cada ano, you’ll need to add mulch so that your bushes always have three or four inches at a minimum around the base (six inches is even better), and extend it out for two feet around them.
You’ll want to remove some or most of the existing mulch before you add some fresh stuff.
The mulch should be flat around the canes, not heaping up higher around the base of the plant. But it’s fine if the mulch is touching the canes – in fact, it should be if you’re doing it right.
Cultivares para selecionar
If you’re looking for an idea of which blueberries to grow in your berry patch, we have a guide just for you, with 10 top varieties .
Below are a few additional options that we also think stand out.
Alapaha
Many rabbiteye cultivars out there are a little antiquated, meaning they were developed decades ago and have not evolved since, but there have been some great improvements in recent years.
‘Alapaha’ is one of those newer cultivars that is worth tracking down.
It has stellar medium-sized fruits that ripen in the late spring. But despite its early ripening time, it flowers later than most early-blooming rabbiteyes, so it is less likely to be impacted by a late frost.
It only grows about six feet tall, so it stays a manageable size, and requires 450-500 chill hours. Consider planting with ‘Ochlockonee’ or ‘Titan.’
Cabernet Splash
If you’re looking for a blueberry that can do double duty, northern highbush ‘Cabernet Splash’ is a good option.
The four-foot-tall plant has dark red foliage in the spring that gradually turns green as the days heat up. No outono, it turns a vibrant red.
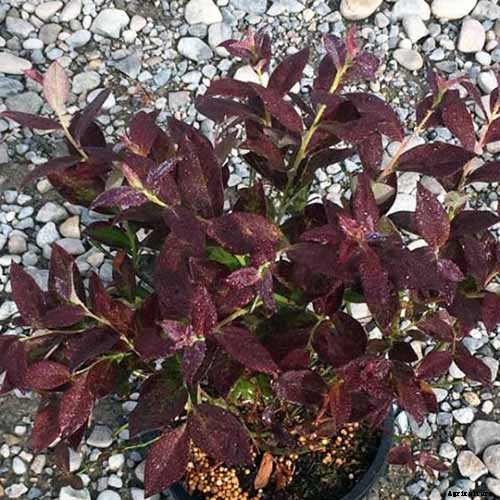
‘Cabernet Splash’
E, oh yeah, don’t forget the fruit. Produz doces, juicy berries, with a large yield on each plant. This cultivar needs about 800 chill hours and grows best in Zones 4-7.
Nature Hills Nursery carries 18 to 30-month-old plants if you’re looking to buy one of your own.
Chippewa
‘Chippewa’ is a half-high blueberry that’s hardy in Zones 3-7.
It was bred at the University of Minnesota with the goal in mind to create a four-foot-tall plant that has beautiful, large leaves and a massive yield of up to six pounds of sweet, medium to large berries per plant.
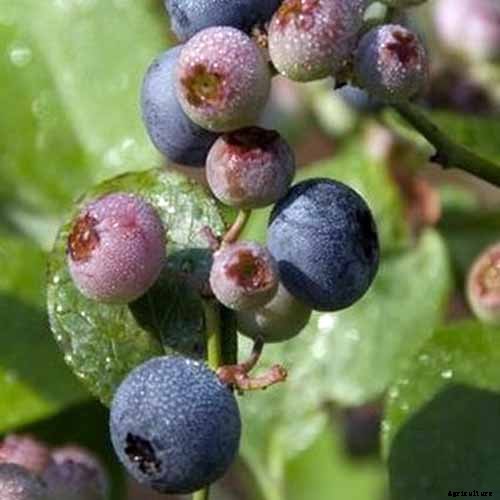
‘Chippewa’
This type is self-fertile and only needs about 800 chill hours, compared to up to 1, 200 that are required for other half-high cultivars.
Nature Hills Nursery sells 18 to 30-month-old bushes that are ready to add to your garden.
Rubel
‘Rubel’ is another northern highbush. This one grows best in Zones 3-7 and produces up to 15 pounds of small, tart berries per seven-foot-tall bush.
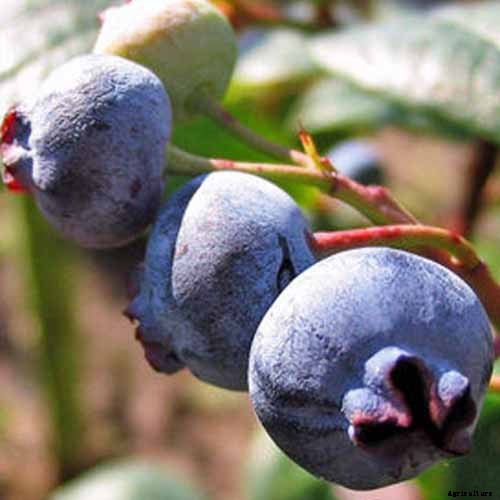
‘Rubel’
It needs about 800 chill hours per season.
If you want one of these gems for your garden, dirigir a the Arbor Day Store to pick up a 12 to 18-inch bare root plant.
Tophat
‘Tophat’ is a lowbush cultivar that retains that wild blueberry flavor. It’s self-fertile and dwarf in size, so it doesn’t grow taller than about 19 inches – perfect if you want a container blueberry .
Despite its diminutive size, you’ll get up to five pounds of tiny berries from this plant. It’s suited to Zones 3-7 and needs about 1, 000 horas de frio.
Gerenciando pragas e doenças
Blueberries aren’t entirely free from pests and diseases, Infelizmente. Some issues are easily addressed, while others can be nearly impossible to eliminate. Let’s take a look at what you may face.
Pássaros
Birds love blueberries as much as people do, and who can blame them?
Since I couldn’t possibly consume all the berries that my bushes grow, I let the birds have at them. But hungry birds can consume quite a number of berries, so if you want to protect your harvest, use bird netting.
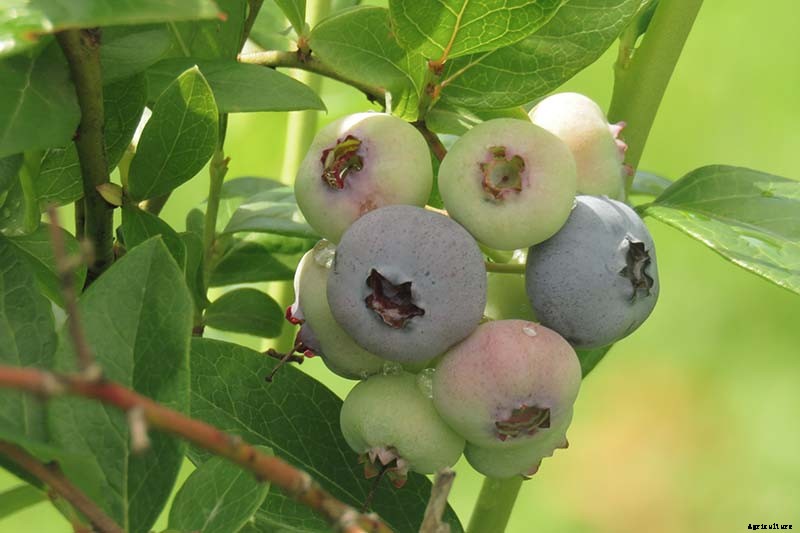
String netting over plants as soon as the first berries begin to turn from green to blue.
While this isn’t the most tried-and-true option, you can also use grape Kool-Aid or sugar to control birds. Sounds weird, direito? But they can help .
Grape flavored Kool-Aid has methyl anthranilate in it, and birds don’t like it one bit. Mix four packs of the unsweetened stuff with one gallon of water and spray plants when berries start to turn blue. You’ll need to reapply every few weeks.
You can also spray plants with five pounds of sugar dissolved into two quarts of water. Spray every few weeks as berries start to ripen. You should also spray after rain.
Most fruit-eating birds can’t digest the disaccharides in table sugar easily, so they won’t go after the plants.
If you find that this spray attracts ants , sprinkle a thin layer of diatomaceous earth (DE) about a foot around the base of your bushes.
Keep in mind that these sprays aren’t as effective as netting, so you may want to stick with netting if you have a serious problem.
Read more about protecting your blueberries from birds .
Cervo
Deer also love to munch on blueberries – both the fruit and the plants. Fencing and commercial repellents are your best options.
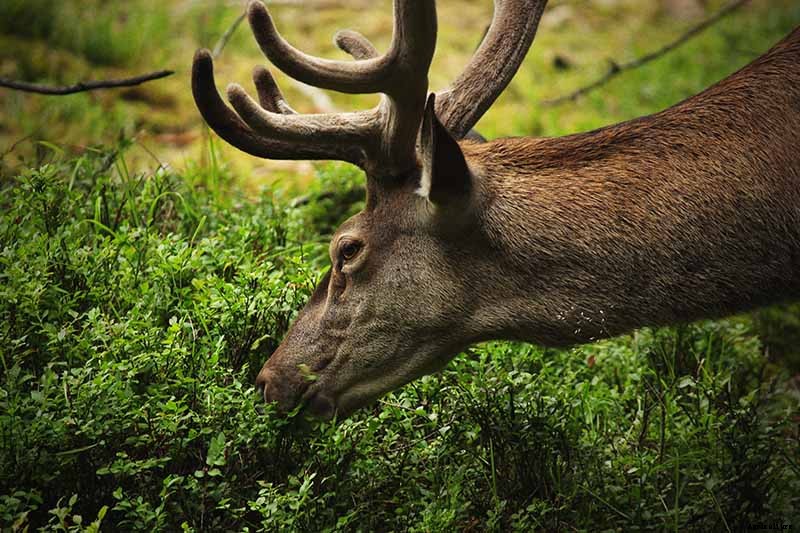
Read more about how to install DIY deer fencing here .
Insetos
Blueberries are troubled by a handful of insect pests, and a few of the ones that do bother them can be devastating, so keep an eye out.
Blueberry Maggots
This pest is the larvae of the blueberry fruit fly, Rhagoletis mendax . The flies lay their eggs as berries start to turn blue.
Common in the eastern half of the US, the adults can be identified by the zigzagging black bands on their white bodies.
Red sticky ball traps can be an effective way to catch the adults before they lay their eggs. If you promptly harvest your ripe berries, this can also help to control populations.
Apple Maggot Trap Kit
Arbico Organics carries a kit with enough balls to protect a home blueberry garden.
Besouros japoneses
Besouros japoneses, Popillia japonica , like to nibble on the leaves of blueberry bushes.
While the plants can handle up to a fourth of their foliage being damaged, if you have a bad infestation, you’ll need to take action.
You can hand pick the beetles and drown them in soapy water.
Aprender mais sobre how to control Japanese beetles in our guide .
Yellow-Necked Caterpillars
If you spot hairy little caterpillars with black and yellow stripes, these are likely yellow-necked caterpillars, Datana ministra .
These pests show up as summer starts to wane. In large enough numbers, they can totally strip a bush of all of its foliage.
Spray infested areas with Bacillus thuringiensis (Bt).
Doenças
Fique atento às seguintes doenças.
There are no cultivars that are resistant to everything, e nem todas as doenças ocorrem em todas as áreas, so you might want to check with your local extension office to find out what to grow in your area to avoid problems.
Anthracnose Fruit Rot
This is a common disease that impacts all species of blueberries. It’s caused by the fungi Colletotrichum acutatum e C. gloeosporioides .
The fungi attack plants particularly during warm, clima quente. Severe infections can lead to serious crop loss.
You won’t see symptoms initially, but as the fruits ripen, they will eventually start to shrivel and small blisters will break out on the skin of the berries. Eventualmente, these will fall off the bush.
But it is also possible for this disease to go undetected until after the berries have been harvested, when they start to rot in storage.
Since you might not know your plants have this disease until it’s too late, prevention is essential. Provide appropriate spacing when planting, water at the soil level, and keep plants well-pruned. Harvest fruit as soon as it is ripe.
Botrytis Blight
O fungo Botrytis cinerea hits during cool, wet weather when plants are blooming. It causes green growth to die back, but the real problem is that fruits will rot after they’re harvested.
Keeping plants well pruned to improve air circulation is key. You also want to make sure you aren’t giving plants too much nitrogen.
You can apply a copper-based fungicide according to the manufacturer’s directions when blossoms are present.
Cane or Stem Canker
Stem canker, also known as cane canker caused by the fungus Botryosphaeria corticis , is especially common in warmer areas like the southern United States.
It causes canes to thicken and form deep cracks. Rather than damaging the entire cane, you’ll see short sections impacted. Eventualmente, the canes will die.
The best option is prevention. Always prune away any canes or stems that show signs of infection as well as any dead canes, whether they are infected or not.
If you know this disease is a common problem in your area, check the information tag on the plant when you buy, and pick resistant cultivars.
Rabbiteyes are generally impacted less and will continue to produce even if they show signs of cane or stem canker. Highbush plants are more susceptible, but there are many resistant cultivars available.
Clorose
All species of blueberries are susceptible to chlorosis, which causes the leaves of the bush to turn yellow or red.
Not technically a disease but a physiological disorder caused by improper growing conditions, this issue is avoidable – but you often won’t realize it’s a problem until you see symptoms.
A high soil pH will cause chlorosis in any species of blueberries, but rabbiteyes are particularly susceptible.
Rabbiteyes may also come down with chlorosis when they’re overfertilized.
In highbush and lowbush types, lack of iron is a more common cause of yellowing than soil pH. Rabbiteyes can become iron deficient as well. Usualmente, the yellowing will start in the spring or early summer.
Spray plants with chelated iron from your local garden supply store. This is a short-term fix while you sort out fixing the soil. Longo prazo, add sulfur or iron sulfate to the earth, como necessário.
Chlorosis can also be caused by stress, which reduces the uptake of iron. If you live in a place where temperatures go above 85°F, be absolutely sure that your plant has enough mulch to protect the roots from heat stress.
Mummy Berry
Mummy berry, causado pelo fungo Monilinia vaccinii-corymbosi , can be devastating. It overwinters in fallen fruit on the ground.
With the arrival of spring, the fungus emerges and infects the leaves and flowers.
It causes flowers to turn brown, murchar, e morrer. Leaves and shoots develop black centers and will eventually wilt and die.
Infected berries turn red or tan instead of green, and they often fall off the plant early. Once they’ve fully mummified, the berries turn gray, and become shriveled and hard.
Harvest and destroy any mummified fruit before it falls. You need to be diligent and keep at it for years sometimes, but eventually, the plant can recover.
You can also keep an eye out for resistant varieties if this disease is common in your area.
Colheita
Blueberries start producing fruits at about two to three years old, but they won’t reach peak production or attain their full mature size until they’re seven to eight years old.

Dependendo da espécie, you can expect to harvest anywhere from under a pound of berries on some lowbush cultivars to 30 pounds or more on some rabbiteye cultivars.
Let the berries ripen fully on the plant before harvesting them. Some species of blueberries, such as rabbiteyes, are non-climacteric, which means the fruit needs to stay on the plant in order to ripen.
Simplificando, non-climacteric fruit has a reduction in respiratory activity and stops producing ethylene after it is picked.
Rather than continuing to turn starch into sugar, non-climacteric fruits start rotting once they leave the plant.
For highbush and lowbush plants, look for berries with a blue stem that are dull or matte. These should detach easily. Fruit with green or red stems or shiny berries aren’t ready to pick.
Rabbiteye blueberries turn their mature color well before they are actually ripe. Wait a few weeks after they’ve turned blue and then pull a sample berry off the bush.
It should come away easily and will be sweet and juicy, with a waxy bloom on the skin.
All berries in a cluster may not be ripe at the same time, so try to avoid picking the unripe ones. Pluck the fruits by hand, and place them in a basket or bucket.
Cool the berries immediately after picking to preserve their shelf life. Don’t wash them until you’re ready to eat them, but remove any debris like leaves or shoots that may have come off the plants while you were harvesting.
For more tips, read our comprehensive guide to harvesting blueberries .
Preservando
Blueberries are full of antioxidants and contain more iron than almost any other fruits that grow in temperate climates.
They’ll last in the fridge for up to 10 days, but they’re best enjoyed three to five days after coming off the plant for the best texture and flavor.
Anything you can’t eat in time can be frozen. It doesn’t take much prep, just wash them, place them in a single layer on a baking sheet, and freeze for a few hours.
Then transfer them to sealed bags. They can keep in the freezer for up to six months.
You can also smoke blueberries. With a little acid, some oil, and a smoker, you’re good to go. Combine two quarts of blueberries with the zest and juice of one lemon.
Add two tablespoons of olive oil. Smoke for four hours with cherry wood chips.
Claro, you can always turn them into jam as well, or pie filling, if canning is your thing.

Finalmente, consider drying them. This can be done in a dehydrator, or in the oven. Heat the oven to 225°F and place the fruits in a single layer on a cookie sheet.
Don’t pack them too tight, and be sure to leave a little space between the berries.
Bake for about two hours until they’re shrunken but not hard. They should be supple but firm. Allow them to cool and then place the berries in sealed containers and store in a cool, Sítio escuro.
They can last for up to 18 months when processed and stored this way.
Receitas e ideias culinárias
Claro, you can use blueberries anywhere you would use berries.
Who hasn’t tossed a handful on their yogurt or waffles in the morning? Our sister site, Foodal has a tasty recipe for maple roasted blueberries on einkorn porridge.

Or how about a healthy breakfast quinoa with blueberries ?

They’re also delicious in desserts. Check out Foodal’s recipe for Blueberry Peach Crisp.

Don’t forget lunch and dinner, também! The mashed berries are delicious baked on fish or white meat.
Guia de crescimento de referência rápida
Tipo de planta:baga perene; tolerância:solo pesado, flooding (depending on species) Native to:North AmericaMaintenance:Medium Hardiness (USDA Zone):2-9Soil Type:Sandy, argiloso, high in organic matter Season:Spring-fallSoil pH:4.0-6.0 Exposure:Full sun to part shadeSoil Drainage:Well-draining Time to Maturity:3 yearsAttracts:Butterflies, abelhas, pássaros, deer and other berry-eating mammals Spacing:4-6 feet (standard), 2-4 feet (smaller varieties)Companion Planting:Azaleas, manjericão, camélias, gramíneas ornamentais, salsa, Profundidade de plantio de rododendros:1/4 polegada (sementes), same depth as container (transplants)Avoid Planting With:Plants that prefer alkaline soil, such as asparagus, beterraba, forsythia, alho, lilacs, kale Height:1-20 feet, depending on varietyFamily:Ericaceae Spread:18 inches - 6 feetGenus:
Vaccinium Necessidades de água:ModerateSpecies:
Angustifolium, corymbosum, darrowii, virgatum Pragas comuns:pássaros, vermes de mirtilo, cervo, Besouros japoneses, yellow-necked caterpillarsCommon Diseases:Anthracnose, botrytis blight, cane or stem canker, clorose, mummy berry, ripe rot
Blueberries Are a Bountiful Bush for Your Berry Patch
Blueberries are the kind of plant that I like to have around even if I don’t plan on eating the fruits.
They add so much beauty to the garden, and if you aren’t interested in the harvest, the wildlife will thank you for the tasty snack.
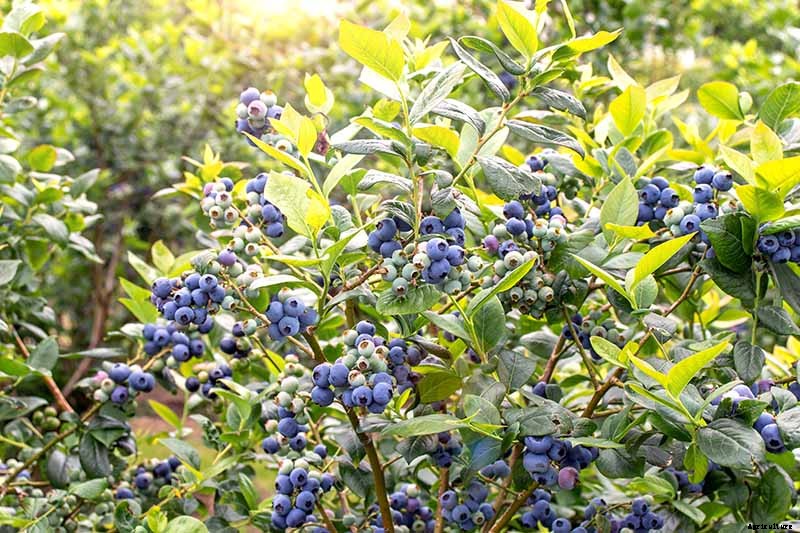
Ainda, most of us humans are after those juicy, sweet berries, e por um bom motivo. They’re nutritious on top of being delicious.
Once your plants are thriving, I’d love to hear how you plan to use up your crop. I’m always looking for new ideas! Share your tips in the comments section below.
If you want to learn more about growing berries and vine fruit, check out these articles next:
- Juicy and Sweet Tips for Starting Your Own Berry Patch
- How to Grow Cranberries
- How to Grow Gooseberries


